Do you want to transform your porch, path and garden into a 2025-grade terror zone with spiders, a stalking witch, a swooping bat, grinning skulls, animated skeletons and floating ghosts and add layers of cobweb and white cobweb? How do you blend cinematic chills (think Frankenstein, a witch effigy, or a ghost effigy) with practical, weatherproof décor that actually survives October rain and wind? And which statement props—an old doll, a black cat silhouette, a perched crow, a pumpkin lantern path, a candle with “blood”, bloody handprints, or even a towering Halloween scarecrow—earn their keep outside? In this tutorial I will demonstrate how I design, source, anchor, light, and layer every outdoor piece to make them look modern, realistic, and durable, and how I naturally incorporate details such as witch hats, a black swarm of spiders, and a black colony of bats to provide as much atmosphere as possible with as little effort as possible.
Spooky Spider Invasion: Webbed Horrors for Your Yard
I begin this scene by making the whole yard a haunted habitat of spiders, that is, a combination of jumbo black spider props and groups of smaller spiders. I apply UV-reactive white cobweb to shrubs, railings and porch columns, and then apply denser cobweb at eye level to photograph well at night. The secret is to pin webs using visible outdoor hooks and fishing line to ensure that gusts do not bring the composition down. I put a couple of inconspicuous skulls and a lurking ghost profile behind the webs as well to suggest that something was caught there before you.
Item by item, I rely on industrial-strength webbing (the kind haunted attractions use) because it stretches finer and reads as “real.” Black spider props are over-sized, high, eaves, dormers, gables, medium spiders infest fences and railings. Vibration motion sensors on the web or illuminated eyes provide that additional shock. Inflatable arachnids are pegged down with ground stakes and the webs are cross-lighted with waterproof, low-voltage spotlights to capture every filament. I will put a pumpkin lantern or two at the edges where it feels right so that the warmth will contrast with the cold, stringy texture.
From experience, I’ve found that clustering spiders by size (big up high, small mid-ground, micro near steps) creates the most convincing perspective. As HGTV experts always say, scale is everything outside, and I can not agree more. A little artificial fog on the ground level is also something I prefer to add depth to those strands without covering the whole façade.
What is still lacking? I’d add a weatherproof audio loop of chittering legs and faint whispers, along with a few “egg sacs” (stuff batting into sheer stockings, dust with gray spray paint) hung in corners for a late-stage horror reveal.
Wicked Witch Welcome: Enchanting Outdoor Displays
In the case of the porch, I construct a story around a dominating witch figure at the center of the entryway, with a pile of brooms, hanging witch hats, and a cauldron with LED-mist bubbling out of it. I love pairing the witch centerpiece with a crouching black cat silhouette and a subtle line of candle with “blood” pillars along the steps for gothic drama. The concept is to turn the door space into the photo-op-visibly prominent, yet heavily layered, yet accessible to trick-or-treaters.

The witch has a full-height, articulated frame so that robes can billow; hems are wired to help the fabric keep its shape. Rustic crates serve as risers to bottles of potions, a cracked skull and bundles of herbs. I run light strands in the cauldron to give it an underglow and place a mini-fogger in it. I hang witch hats above with fishing line so that they seem to be floating in the night air one of the easiest and most effective illusions you can create in a small footprint.
In my career, I have read in Architectural Digest articles that contrast sells: matte-black fabrics with flickering amber light are read as luxurious, not cheap. Therefore, I make color schemes intentional charcoal, moss, oxidized copper, so that the witch scene does not look cluttered.
To finish, I’d add a motion-triggered cackle (short, not looping constantly) and a broom parking sign to inject humor without undermining the ominous tone.
Bat Colony Takeover: Eerie Twilight Transformations
I set the front like a flock of bats–particularly a colony of black bats on the wing–issue forth of the chimney and dart across the siding. I use matte, stiff PVC cutouts because they are durable and mounting outdoor putty that can be removed to preserve finishes. The key is directional flow: start densely at a single origin point (chimney, attic window) and thin out as the colony “flies” across the house and trees.
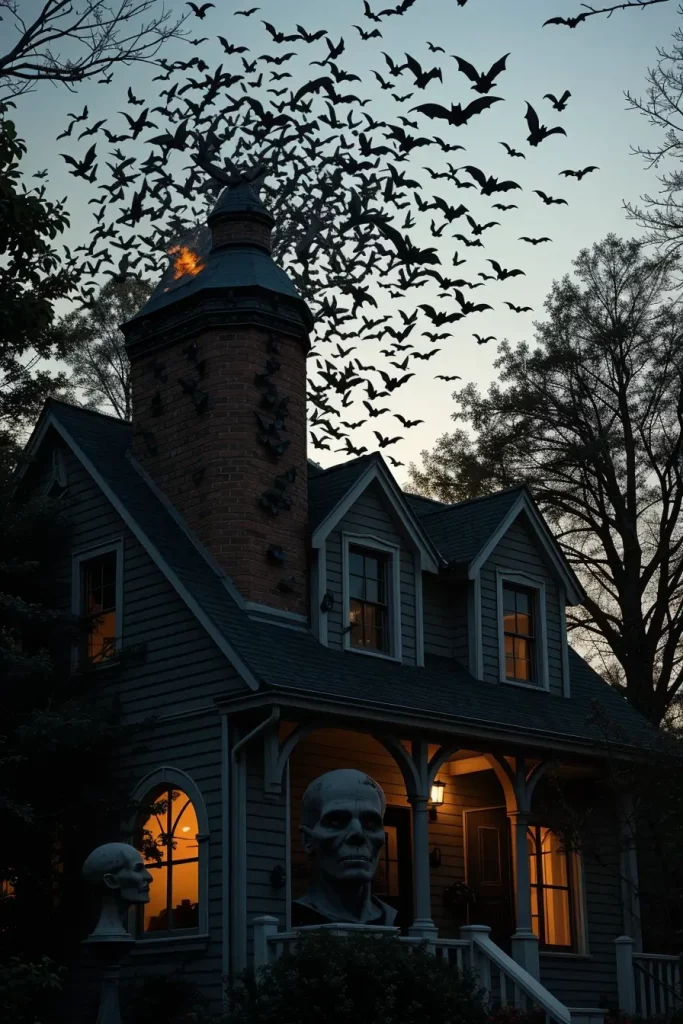
Each cutout is a little bit different in wingspan and angle to make the silhouette organic. I will backlight some of them with low-wattage bullet lights to provide shadows that will give a sense of movement. I prefer to have a small-grave vignette with a Frankenstein bust, some scattered skulls and a half-buried skeleton hand, under the colony, which is not obtrusive, but pays off a careful visitor.
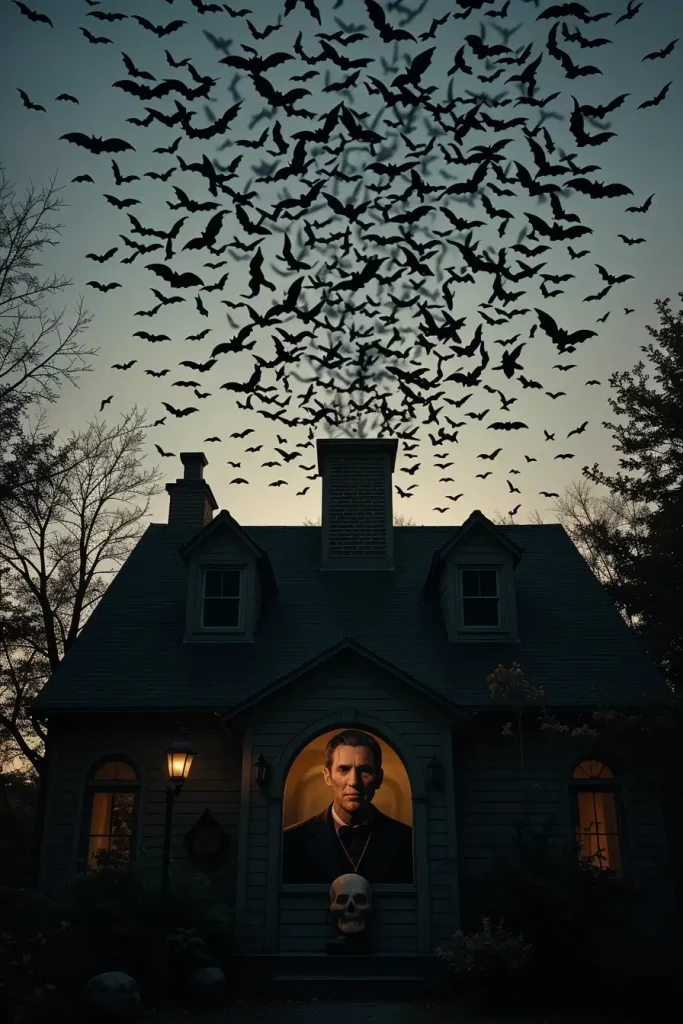
My thumb rule: the more and smaller the bats, the more they will read as real flight; the less and the bigger the bats, the more they will read as prop. Repeat, repeat, repeat, as Martha Stewart Living so frequently reminds us, it is your friend, repeat an element many times to create visual rhythm. I also position two crow silhouettes on a close branch to form a predator-prey subtext without uttering a single word.
To take it a step further, I would apply UV tape to certain edges of the bats so that they glow under blacklight and provide the colony with a ghostly glow in twilight.
Skull Garden Pathways: Bone-Chilling Yard Accents
It is practical and delicious to guide the guests with the illuminated skull stakes on the walkway. I choose low-voltage or solar-lit skull markers at regular intervals to give safe footing and theatrical rhythm, ground level. I sprinkle the crushed black mulch between them, and tuck in tufts of white cobweb to soften edges.

The skulls are given a unique finish: matte plaster, glossy ceramic, faux-aged bone so the line does not feel like something that was ordered in a single click. Some I will also insert small flicker LEDs to make them look like dying candlelight. I tend to place a mini Halloween scarecrow sentinel at the entrance to the path to give it an anticipatory feel.
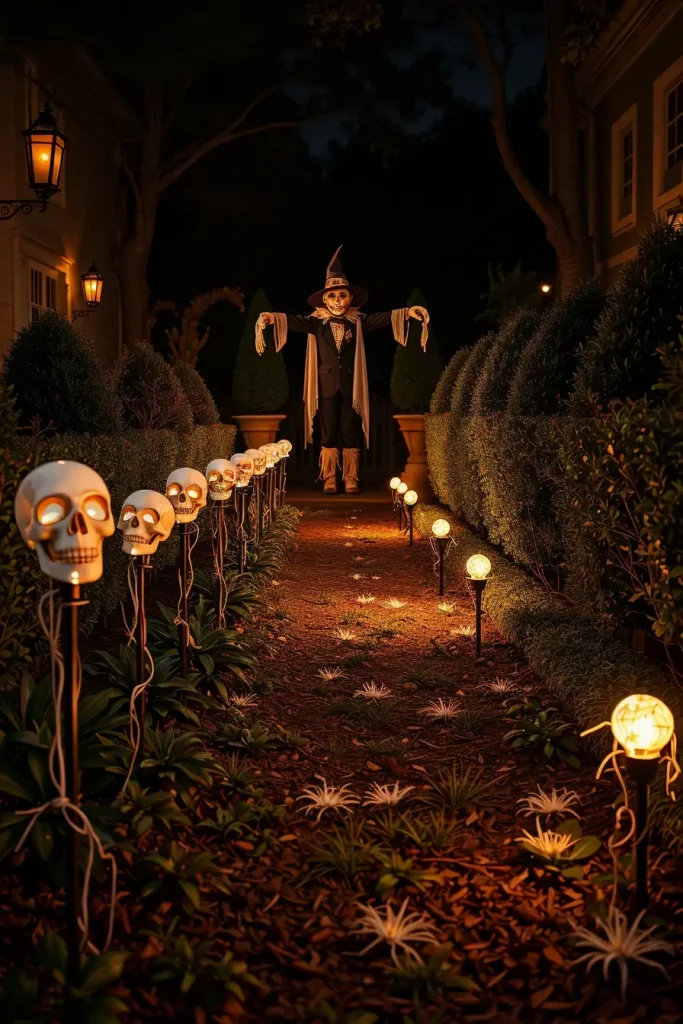
As a professional, I believe that guests like it when spooky is also navigable. The final two-in-one is path lighting that serves as decoration, a tip I have read repeated by several outdoor lighting designers in the US press. In drama I occasionally aim lights at the sky so that they create distorted skull shadows along the hedges.
To further enhance it, I would incorporate some minor sound beacons, such as bone creaks, shuffling, etc. that would activate when people walk past, but only in certain spots so that it is not noise fatigue.
Skeletons on the Lawn: Creepy Guests Who Never Leave
The Swiss army knife of Halloween staging is full-size poseable skeletons. I place them in the middle of action: one is mowing the lawn, another one is drinking out of a chalice on the bistro table, and the third one is climbing the gutter. I enjoy weaving story into them, they are perhaps constructing a grave, saving a friend out of the ground, or having a tea party under a dead tree.
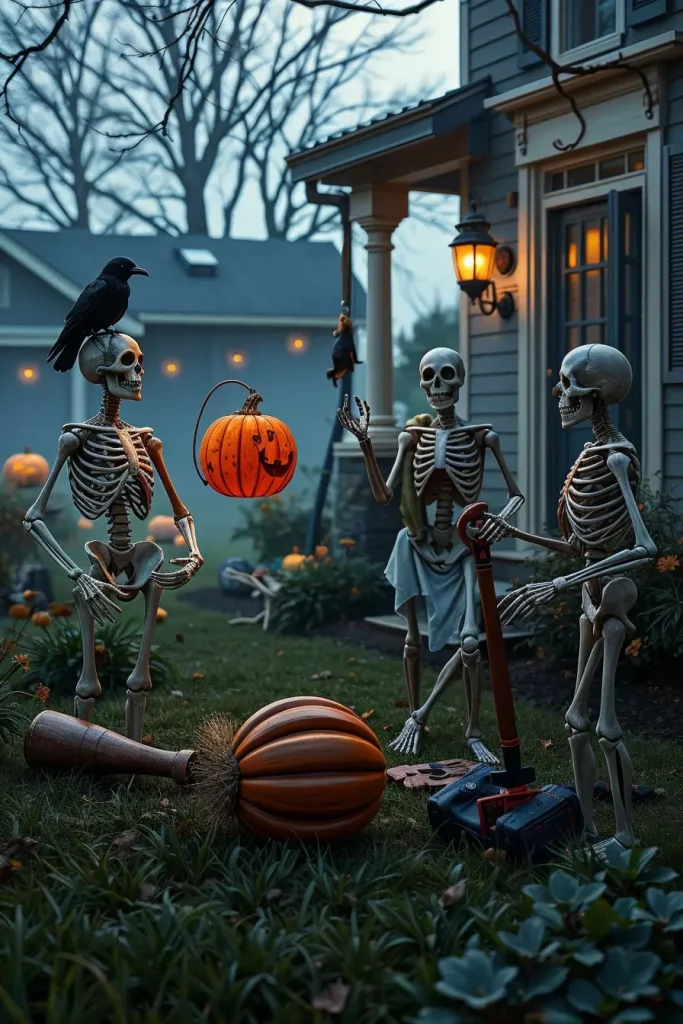
I strengthen joints with transparent zip ties, anchor feet against the wind, and have concealed rebar to maintain upright poses. The story is sold by accessories: a knocked-over pumpkin lantern, a crow sitting on a clavicle, a black bat dangling on a ribcage or a chair covered with cobwebs. A sprinkling of bloody handprints on nearby garden tools can amuse (and unsettle) observant visitors.
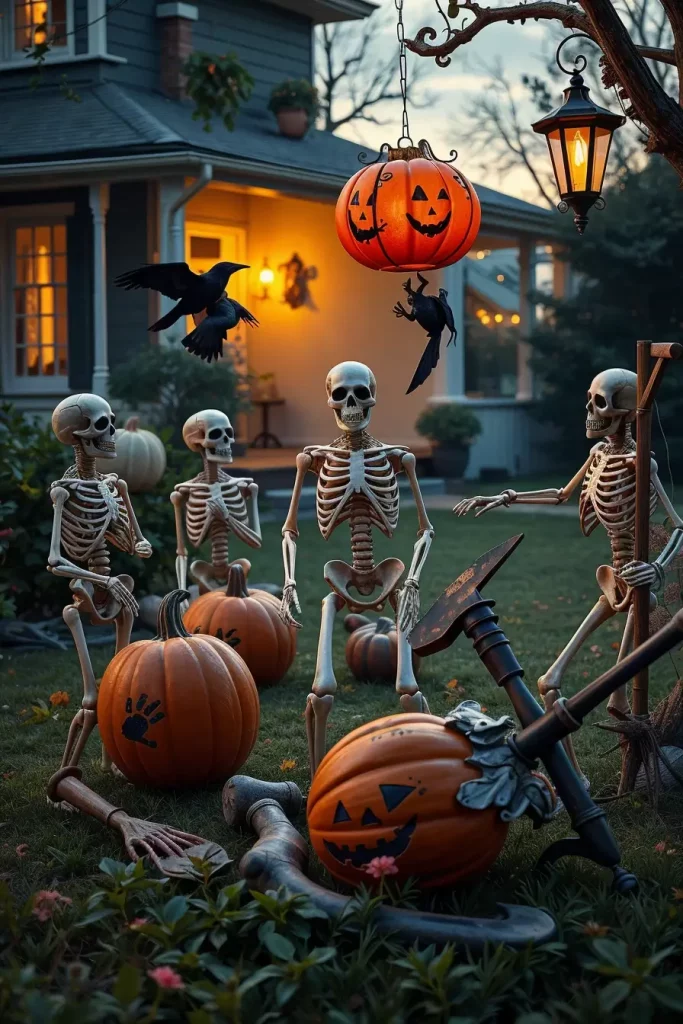
I have learned this after years of doing it: daylight humor, nighttime horror. The tableau is playful by day, but at night, when the uplighting strikes the empty sockets, it switches to macabre. This day-to-night contrast is a standard trick that most professional decorators suggest since it maximizes the ROI of any prop.
I would still have a low fogger around the ankles of the skeleton crew to keep them grounded in a misty layer, and a concealed fan to move clothing or added cobweb strands.
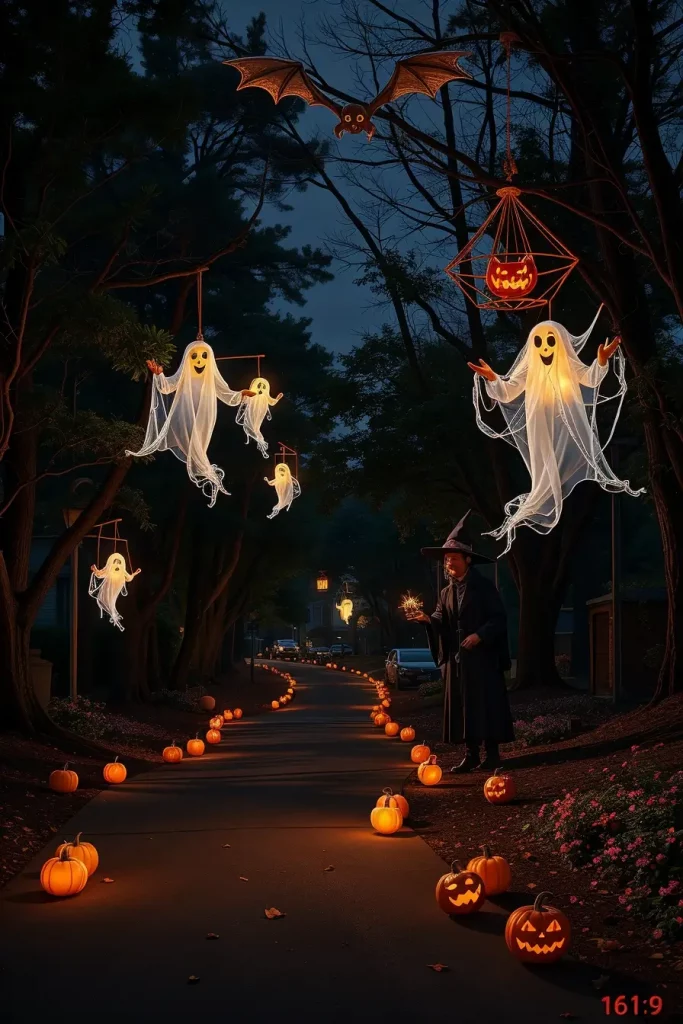
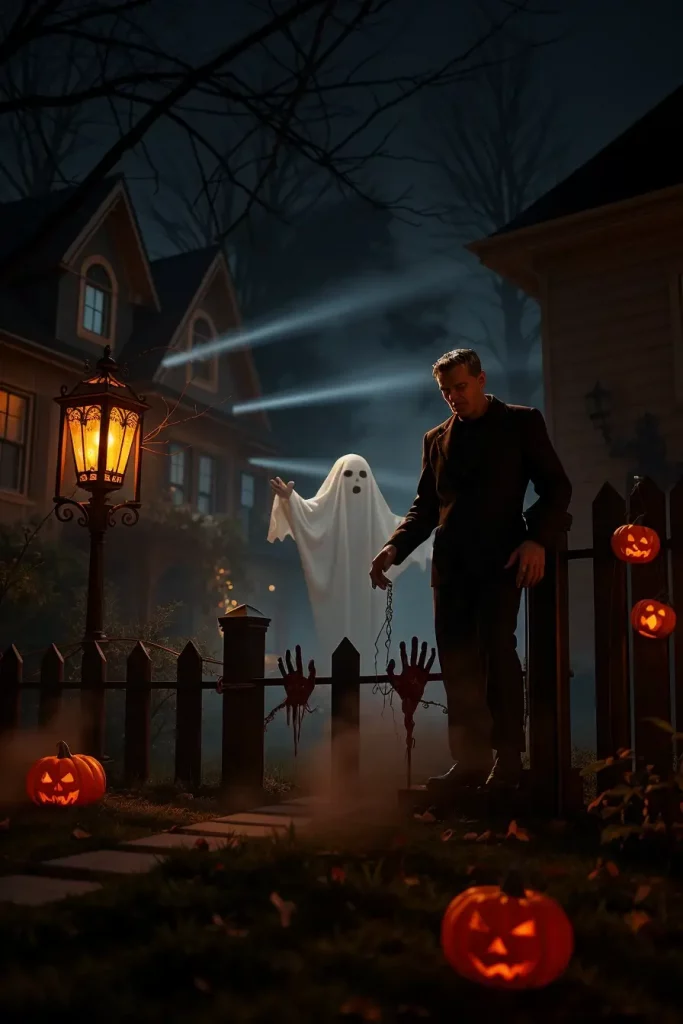
Ghostly Appearances: Floating Phantoms in the Dark
My floating ghosts are based on translucent ripstop or tulle over lightweight foam heads with nearly invisible fishing line attached to branches, pergolas, or porch ceilings. One of the highlights is a giant ghost effigy suspended over the entrance, illuminated by a cool-white LED, to give the ectoplasmic X-ray effect. I place them very carefully so that they turn lightly with the breeze, and have a natural drift.
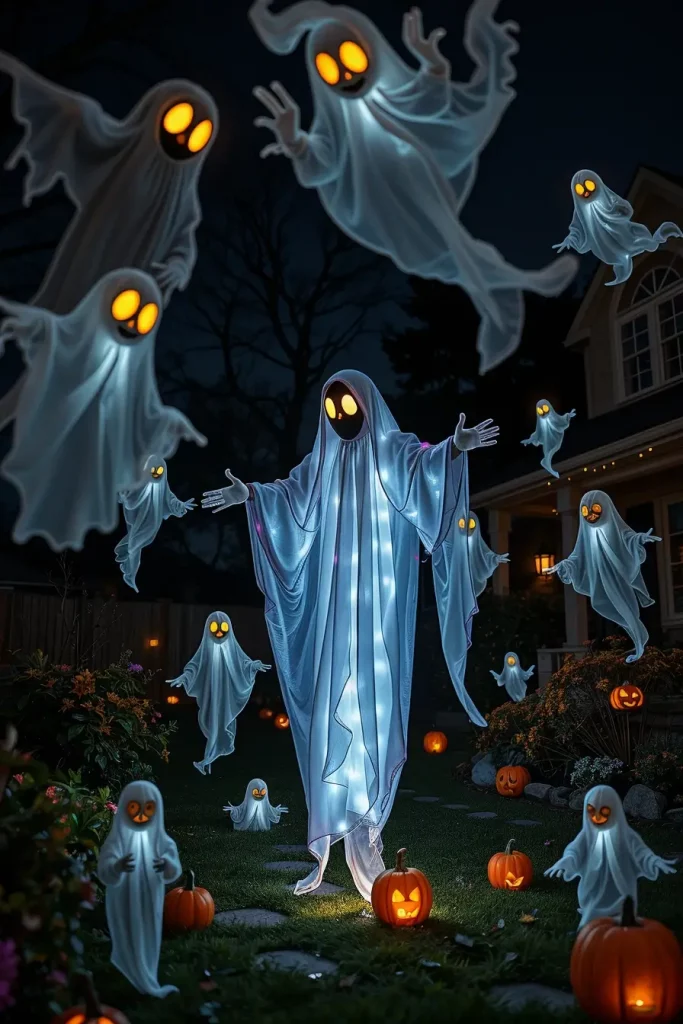
I put puck lights or LED orbs in the heads to make them look like a lantern. Next I put in smaller groups of ghosts in the back of the yard to give depth, your eye is drawn back and forth, increasing the scale. To connect the theme, I include ethereal cobweb poofs at the feet of the ghosts so that they appear to have come out of the ground fog.
I’m a fan of mixing cold and warm color temperatures—cool light on the ghost forms, warm on nearby pumpkin lanterns or a candle with “blood” scene—because the contrast keeps the eye moving. Contrast in temperature is as effective as brightness contrast in the outdoors, as many lighting designers emphasize.
To complete the illusion, I’d add a whisper-track audio bed (wind, distant chanting, rustling leaves) on a low volume loop to make passersby wonder if they actually heard something.
Cobweb Covered Corners: Abandoned and Haunted Aesthetic
I make thick cobweb nests in corners of neglected porches, or under stair runs, or between fence posts, and they appear to have not been touched in years. I apply white cobweb on top of each other to see it, and then spray it with gray paint to give it an aged look. I anchor tiny black spiders (and a few large hero ones) in each cluster, and embed a stray old doll head or cracked skull to suggest a forgotten past.
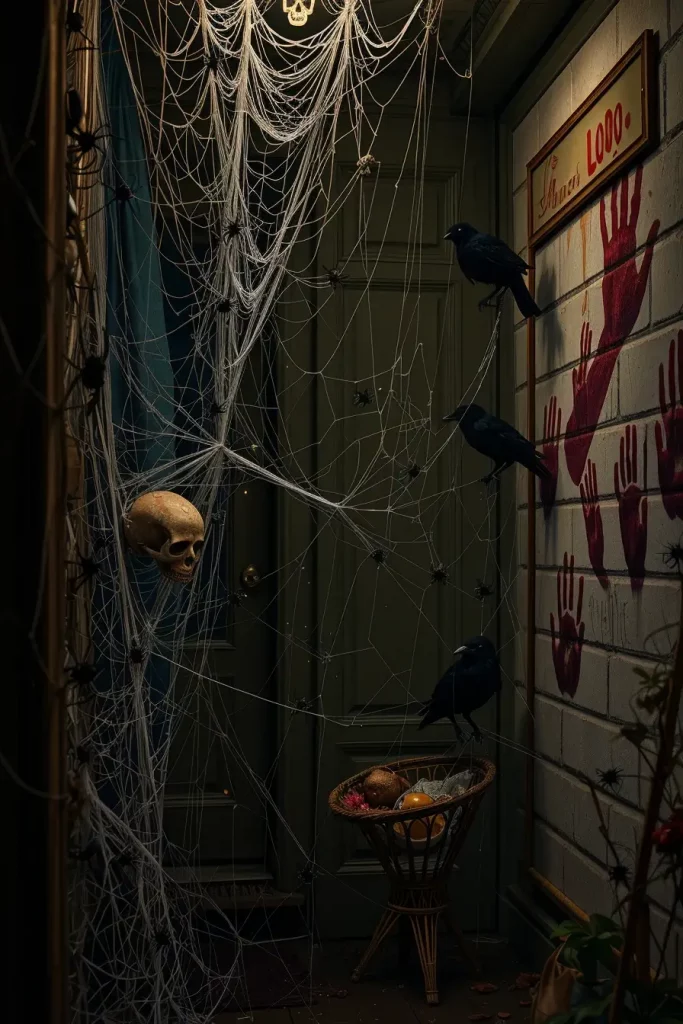
I employ tension rods or nylon cord grids such that the web strands are under tension and do not sag following a rain. Within those grids I stitch battery micro-LEDs so that the web itself glows at night. I could even put some smeared bloody handprints on one wall to suggest panic and flight. A crow or two perched on the head closes the abandoned vibe.

Based on my personal installs, I have seen people spend the most time in these cramped, detail-heavy corners- so I have started to think of them as tiny set designs, and they deserve to be examined up close. This philosophy is reflected in the tips of set decorators: macro scares attract you, micro scares retain you.
What more would I say? A broken window with bloody handprints in vinyl and a sleeping Frankenstein switch panel nearby- a suggestion that something in this corner may come alive any moment.
Old Doll Fright Zone: Twisted Toys on the Porch
I transform a silent corner of the porch into a psychological horror scene with an old collection of dolls glaring at the visitors in broken rocking chairs and weathered crates. I layer torn lace, burnt muslin, and tufts of white cobweb so the space feels long-abandoned, then punctuate the scene with a discreet candle with “blood” pillar to add a sinister, ritualistic vibe. A small black spider that crawls on a porcelain cheek, a skull that is partially covered, and a hanging bat charm on a rusted mobile make the tableau seem cursed, but not excessive.
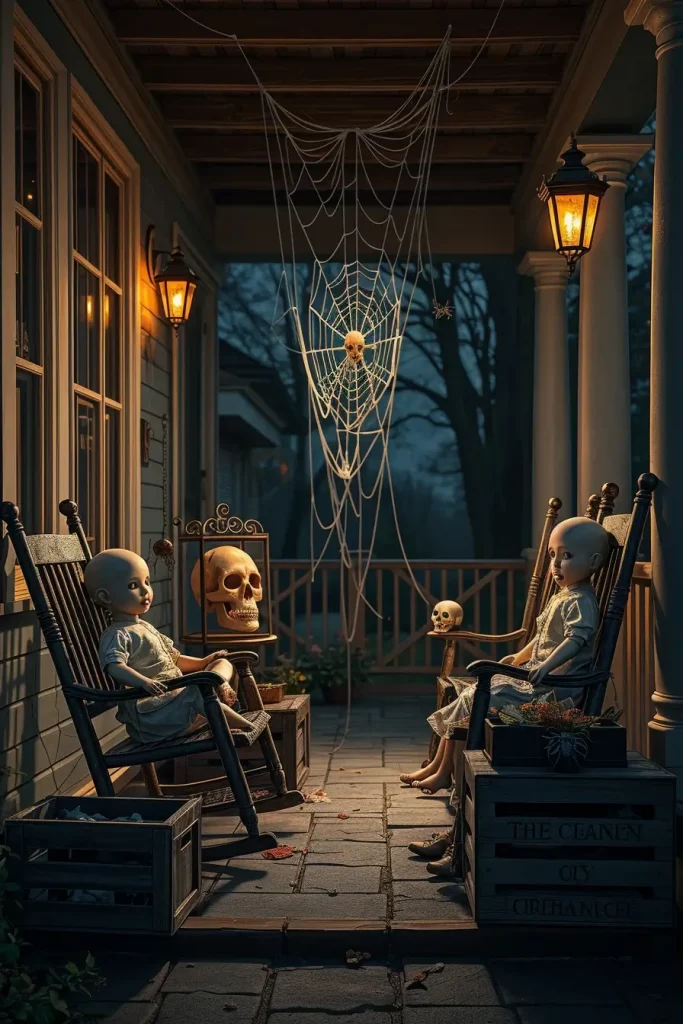
I place a large broken old doll piece by piece in a central rocker, with smaller companions on an old side table. I sprinkle a child-sized tea set glazed with fake bloody handprints, an overturned pumpkin lantern and a shattered mirror that reflects unexpectedly passing guests around them. I hang cobweb between architectural posts and run micro-LEDs through it so that the strands are faintly lit at night (above). Those who look closely will get a wink with a miniature Frankenstein figurine hidden under the chair.
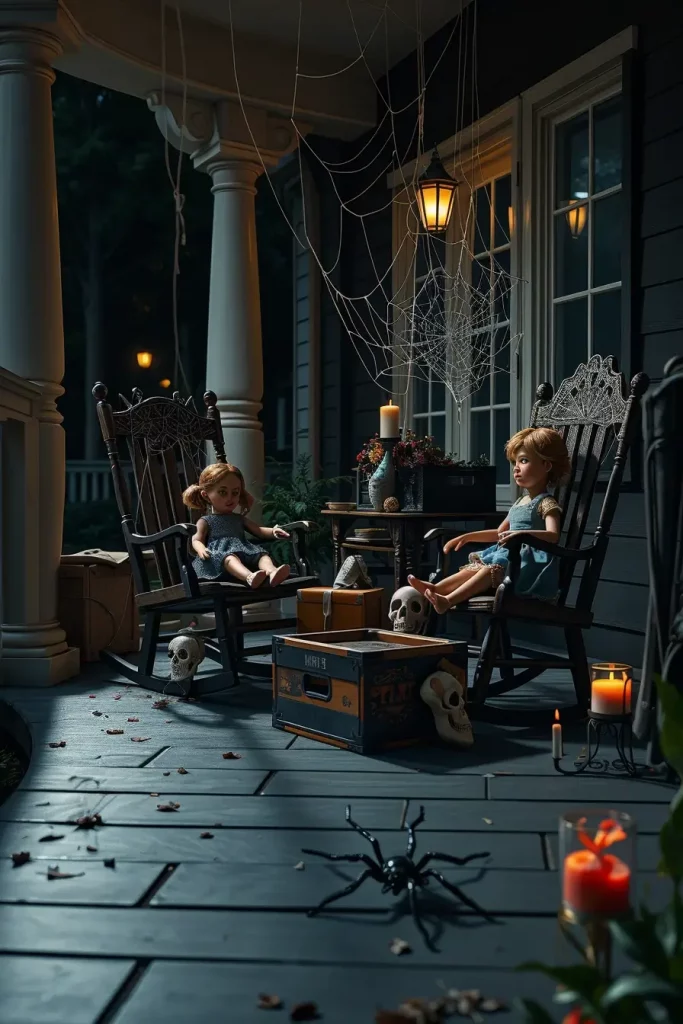
As I have found out, restraint is the most important thing here, as it must be creep and not camp. I steal a page out of the set decorators of horror who stress isolation and stare: one old doll staring straight at the door is creepier than twenty scattered at random.
To complete it, I’d add a softly looping, detuned music box track and a motion sensor that subtly tilts one doll’s head toward approaching guests (slowly—fast motion kills the realism).
Black Cat Crossing: Superstitious Silhouettes
In pathways and front yards, I adore using sleek black cat cutouts or inflatables as prowling guardians to give a visual linkage between porch and garden. I pose them half way through a stride–tails up, backs arched–in the shadows of sparse shrubs covered with cobwebs, with a witch silhouette or witch effigy in the background to complete the superstition tale. To bring the scene together, I have ground-level amber lighting, which grazes the cats and casts long, threatening shadows.
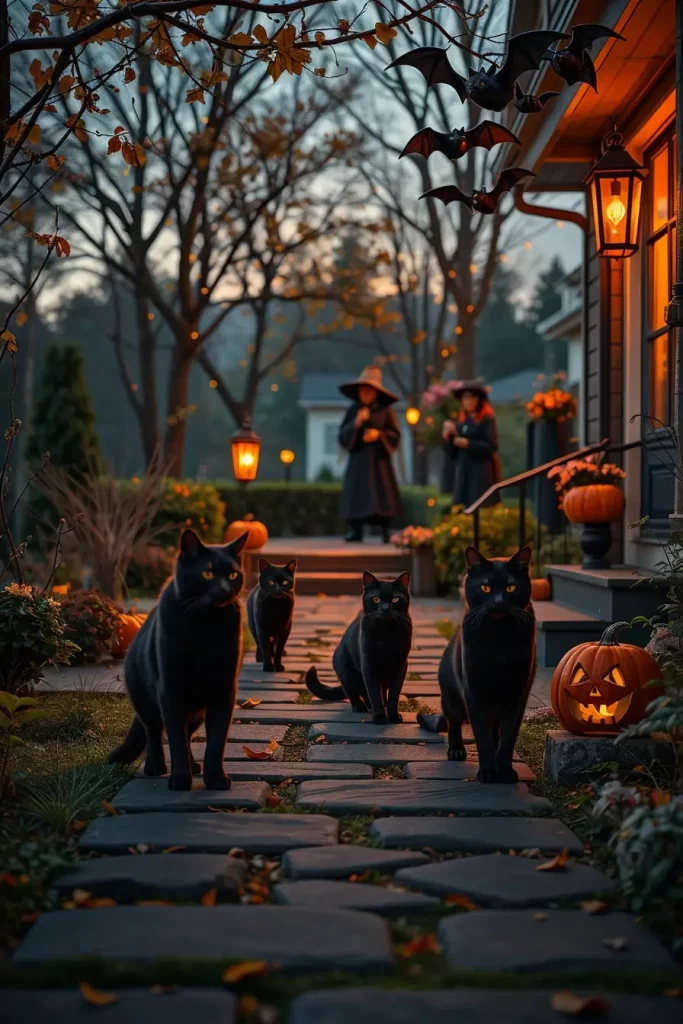
To make them durable, I cut the silhouettes out of outdoor PVC or metal, and raise some of them on risers concealed in foliage to add height. Near the door, I might place a realistic faux cat with reflective eyes next to a cracked skull, pumpkin lantern, and small candle with “blood” cluster to intensify the focal point. The entry is framed by a grouping of hovering black bats above the door in a unified color narrative- black on black, warmly lit.
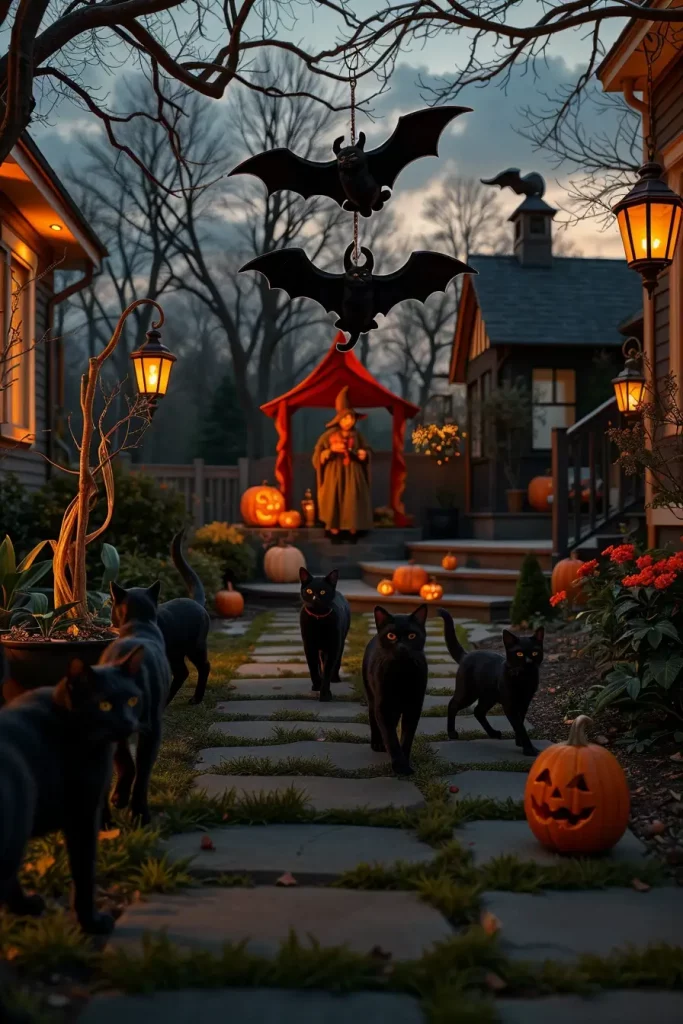
Personally, I find black-on-warm lighting (vs. cool) keeps things readable and elegant—something pro lighting designers frequently emphasize. And when you already have witch hats floating on the porch, the echo of the matte-black color in the whole yard makes everything look curated.
I would also include an animatronic tail swipe on one black cat at the steps and soft gravel footing so that the crunch is louder as the guests get closer to build tension.
Crows on the Fence: Ominous Watchers in the Shadows
An instant surveillance is established by a line of crows sitting on the fence or arbor. I cluster them in odd numbers, some facing forward, others slanting as they are in the middle of a call. To give the scene more narrative effect, I put a seated skeleton with binoculars turned back at them–role reversal–and dust the railings with white cobweb to suggest that no human has dared brush past. An isolated Halloween scarecrow is slumped down there, all twisted with black bat cutouts, as though he has lost his post.
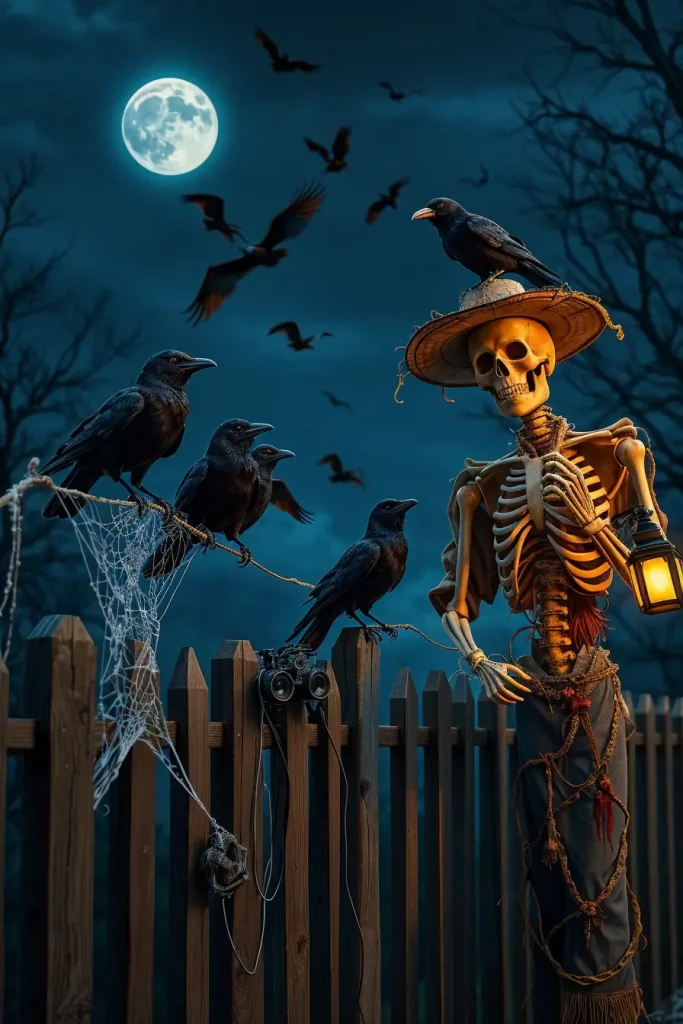
I prefer hyper-realistic faux crows whose claws are made of wire so that they hold wood and iron. Below, a cluster of skulls, a sputtering pumpkin lantern, and a candle with “blood” create a ritualistic feeling. I also draw light bloody handprints on one of the fence post which is not noticeable until a spotlight passes by it at night.
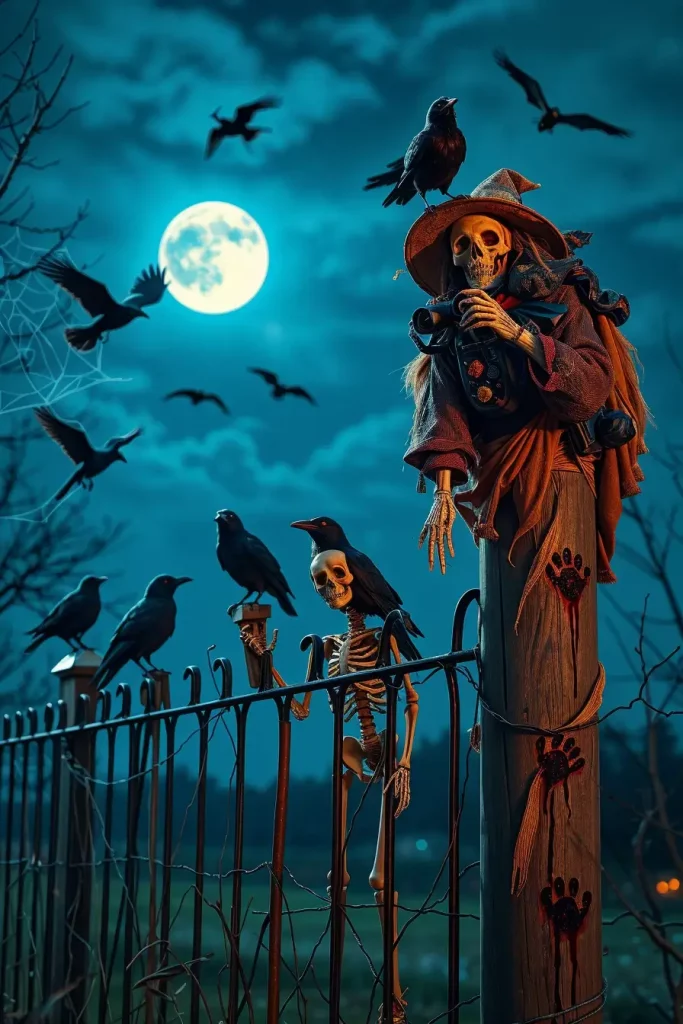
In a professional sense, I prefer dim blue uplights on the crow row and amber path markers, cool vs. warm always reads rich. Other decorators are fanatics about non-repeating poses of animals, and I am one of them: the same birds kill the illusion at once.
To take it a step further, I would add a far off cawing sound on a low timer, and a small flickering lantern hanging off the arm of the Halloween scarecrow to guide the eyes down the fence line.
Candles That Bleed: Gothic Lighting with a Twist
I use candle with “blood” pillars as dramatic punctuation along the steps and porch ledges, pairing them with antique-style candlesticks and wrought-iron wall sconces. Outside, I prefer LED ones that look realistically dripping, and conceal power packs in hollowed bottoms. I group around them little skulls, a watchful black cat, and a ragged piece of cobweb to suggest a broken ceremony. The effect is close, broody and surprisingly sophisticated.
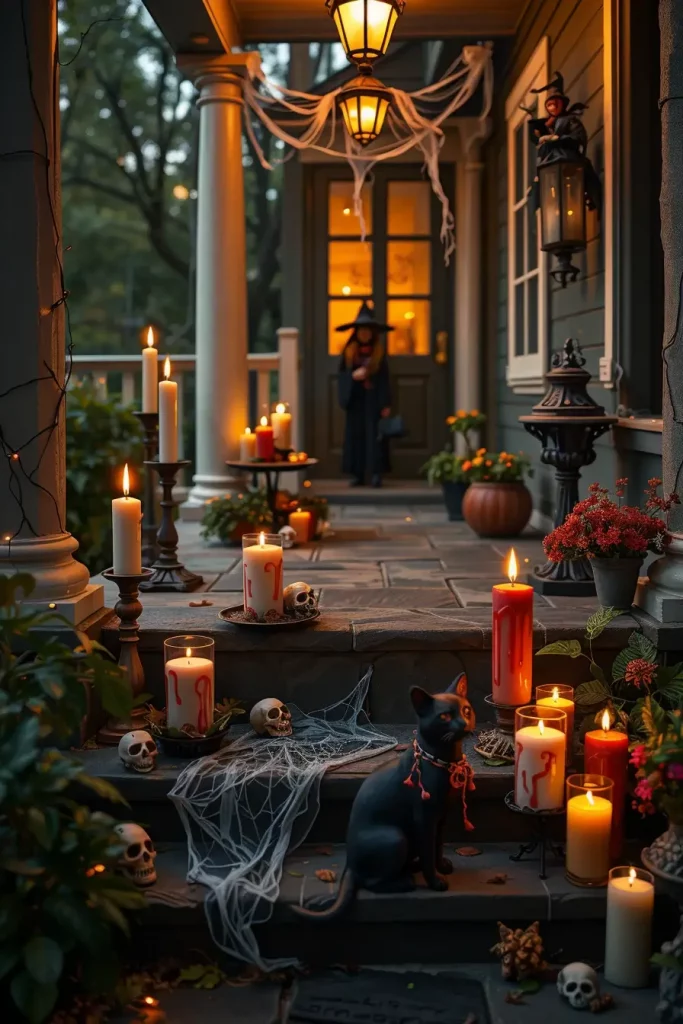
The groups of candles are assigned a hierarchy: the tallest in the back, the low votives in the front, with slightly different tones of blood to prevent repetition. I occasionally add deep oxblood taper candles to give variety. When the entrance has a witch effigy or ghost effigy, I match the candle color to their wardrobe accents so that the palette is deliberate. The mad-lab undertone is finished with a distant Frankenstein switch plate on the wall.
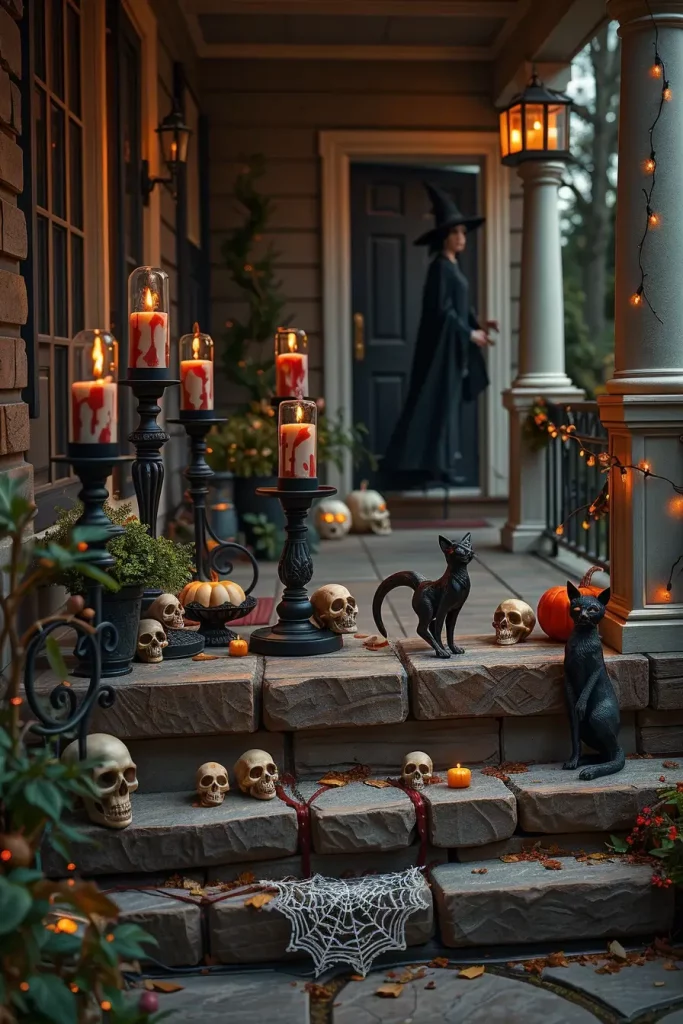
Experienced stylists taught me that it is essential to maintain a steady temperature of candles, and too many color temperatures look sloppy. So I set all LEDs to a warm 22002400K so that the flames look warm.
To finish, I’d add wind-protective hurricane tubes (matte to avoid glare), hidden magnets to lock candlesticks to metal trays, and a timed sequence that starts the “bleed” effect right at dusk.
Pumpkin Lantern Parade: A Path of Jack-O’-Lanterns
The night can be marked by a serpentine line of pumpkin lanterns across the lawn and up the path. I whittle different characters- threatening, silly, sad- and insert warm LEDs to have safe, uniform illumination. Along the edges I put white tufts of cobwebs, a wandering black spider, a toppled skull or three to keep the sweetness spiked with menace. The torchbearer is a huge Halloween scarecrow at the trailhead.
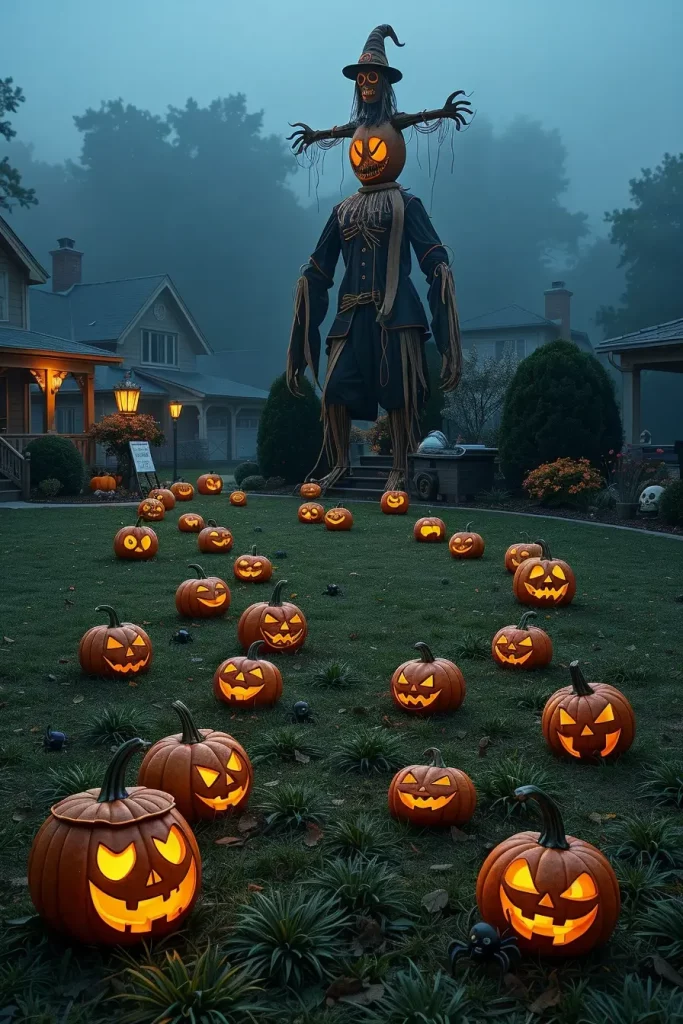
I like mixing real pumpkins with durable foam ones (for height and longevity), placing the tallest at curve apexes so they anchor sightlines. I put in between them low foggers, so as to keep the glow obscured. The sunny parade is turned into a cliffhanger ending by a ghost silhouette at the end, and a faint bloody handprints decal on the front door glass.
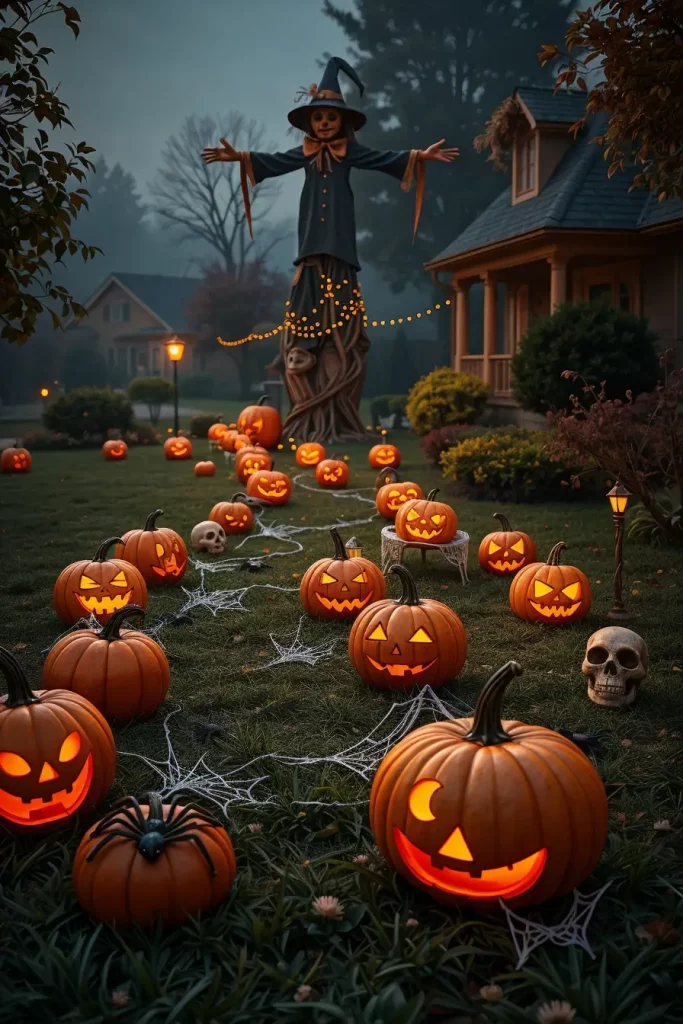
Practically, spacing is important, lighting professionals handle pumpkins as pathway luminaires. I maintain distances of 75-120 cm, and then I interrupt the rhythm one or two times to surprise.
I would include some carved cameos, small bat, black bat, and witch hats designs to sew in our vocabulary across the whole article, and some audio whispers that play when the guests reach the final third of the route.
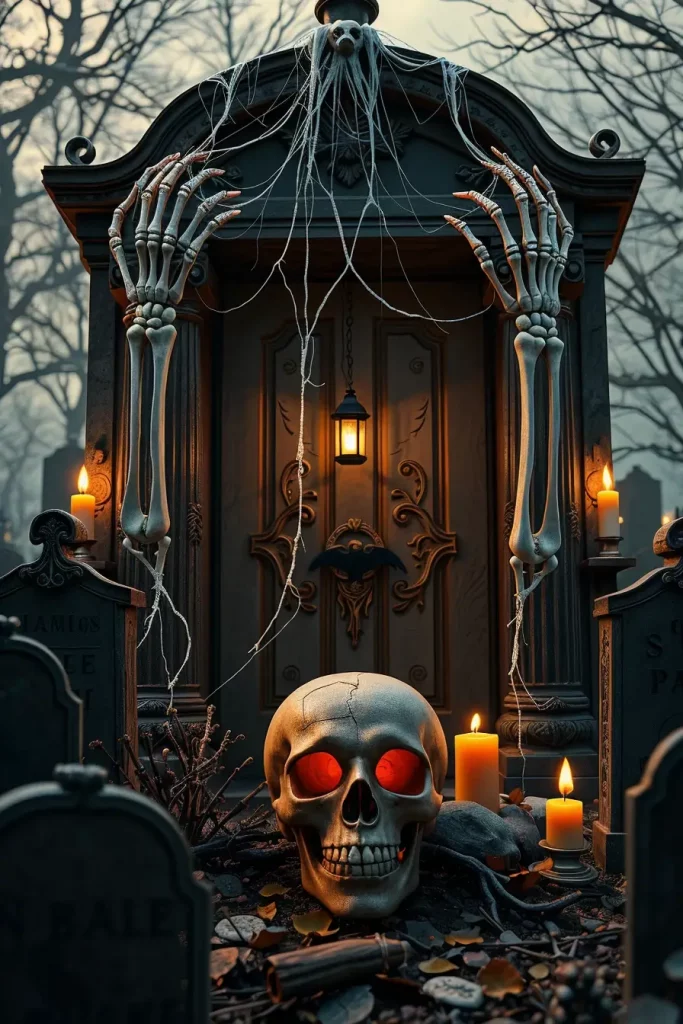
Bloody Handprints on Glass: Terrifying Entryways
As a shock value, vinyl bloody handprints smeared on sidelights and storm doors are a signal of instant terror. I surround them with shredded cobweb, a hanging skull wreath and a guard skeleton with a Don t Enter sign. A demure witch silhouette inside the foyer window (visible from outside) implies someone—or something—is still home. The composition is finished off by a perched crow or two on the transom.
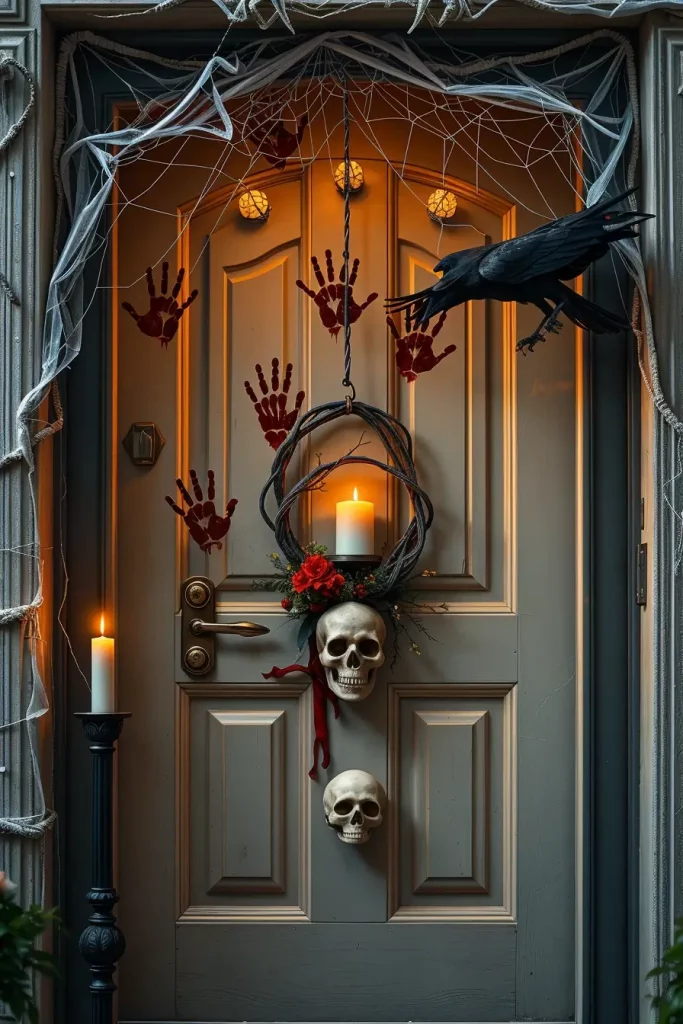
I use removable decals that are of high quality to make clean-up on 1 st November painless. Inside, I set a flickering candle with “blood” behind frosted glass so it reads like a living ember. A black spider drifting over a window is a small detail that will reward itself in pictures.
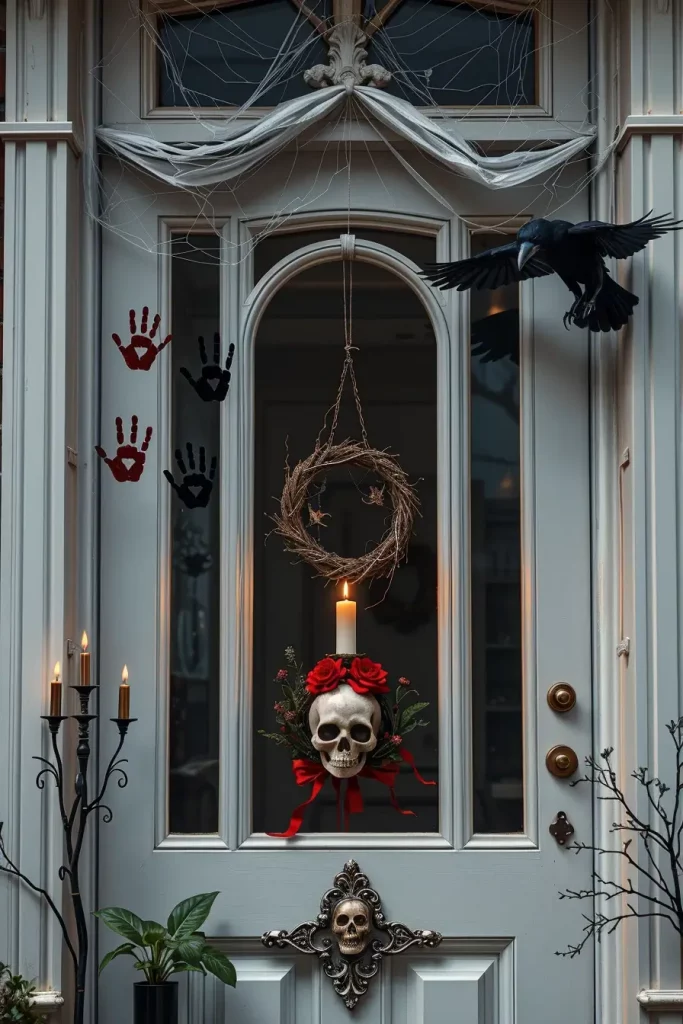
My take: this scene works best when it is held back- a couple of ideal prints, not a wall of blood. Less may be more in the outdoors as several US décor editors point out, when you desire glamour with your terror.
I would include a red wash light that comes up when someone steps on the mat and goes away, as though the house has become aware of their presence.
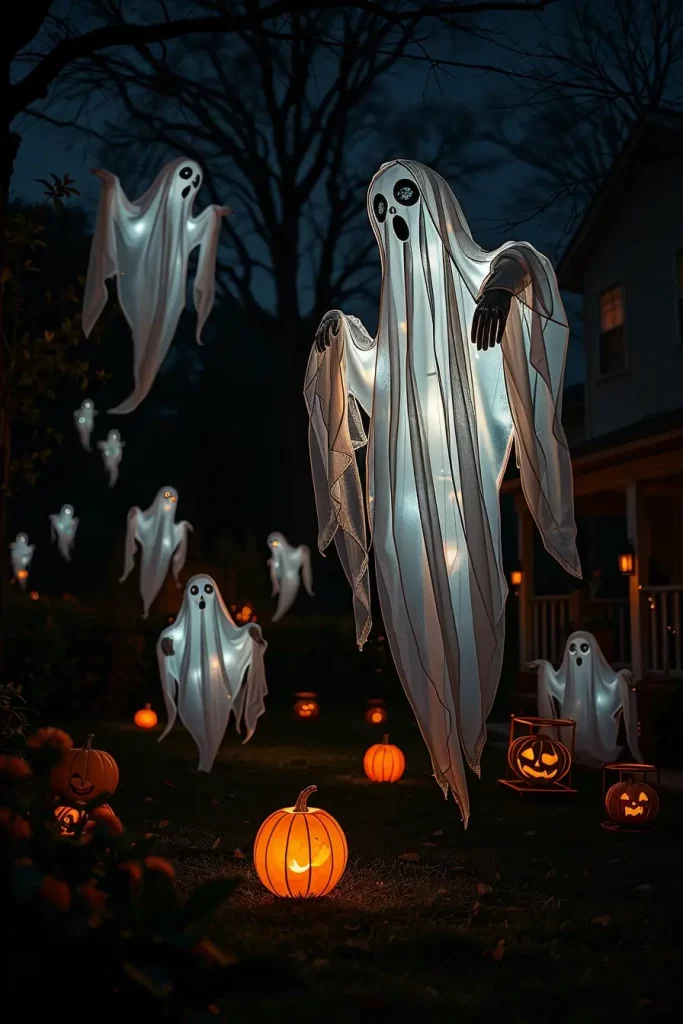
Floating Ghost Installation: Ethereal Spirits in Motion
I take the previous ghost therapy to the next level of a kinetic, choreographed realm of phantoms with rotating swivel hooks, monofilament, and ultra-light fabrics. The hero piece is a huge ghost figure floating across the driveway followed by smaller spirits that are attached at different levels to form a wave. I weave strands of white cobweb between the branches to make the figures seem to be ripping themselves loose of an old veil.
The LED orb or puck is provided to each floating ghost to light up internally, with cool-white backlights around the edges. For contrast, warm pumpkin lantern clusters and a flickering candle with “blood” altar sit at ground level. To tie lore together, I put a witch figure on the edge with her arms up as though summoning them, with a Frankenstein panel and a bat mobile spinning around to create visual turbulence.
I’ve learned that the slightest breeze is your friend—fabric choice (ripstop, organza, or tulle) determines how gracefully they move. Pro tip: put fishing weights on hems to control the sway, not spin like crazy.
What is still lacking? Directional audio. Whispering choruses that move left to right sell the notion that the ghosts are moving across your land.
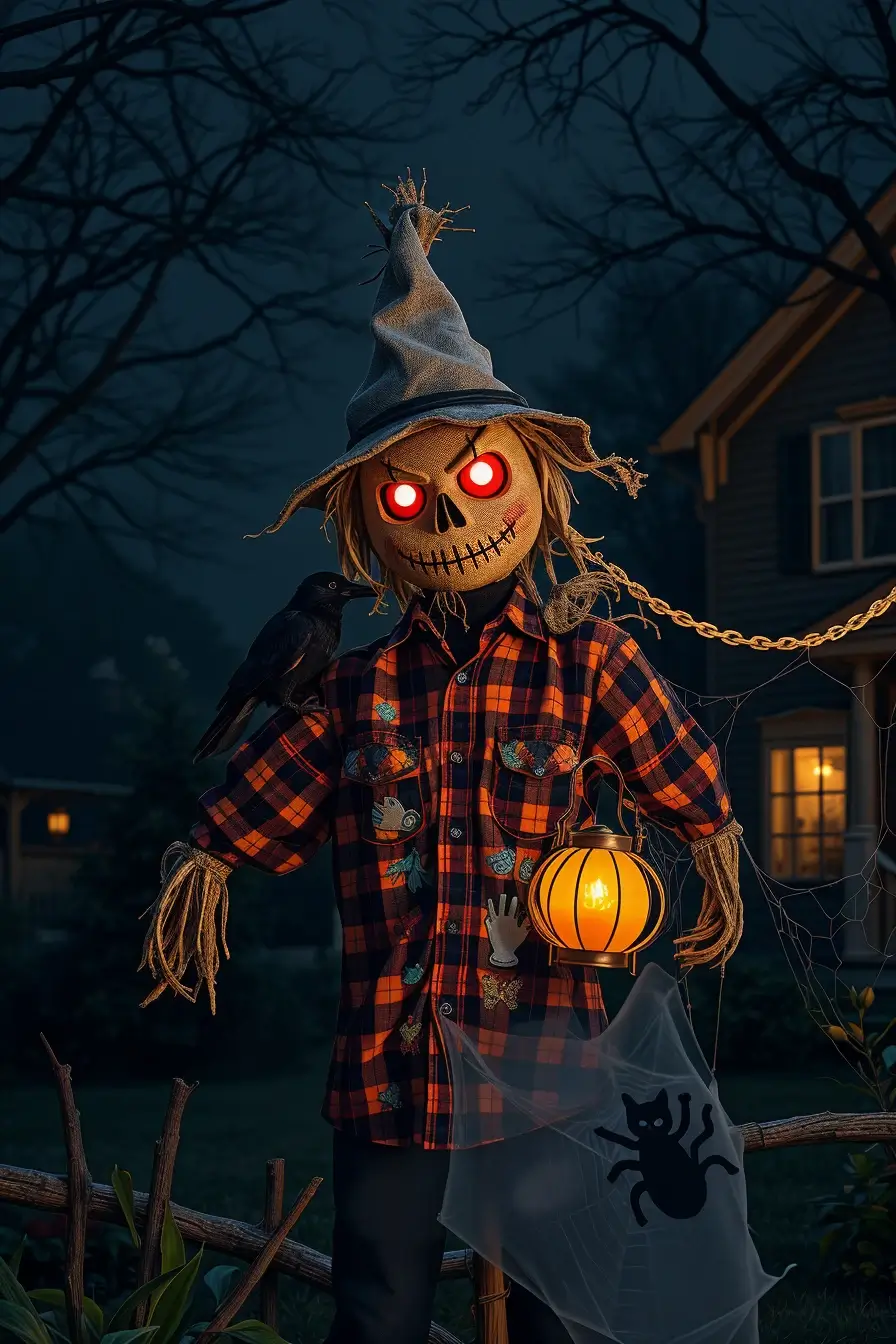
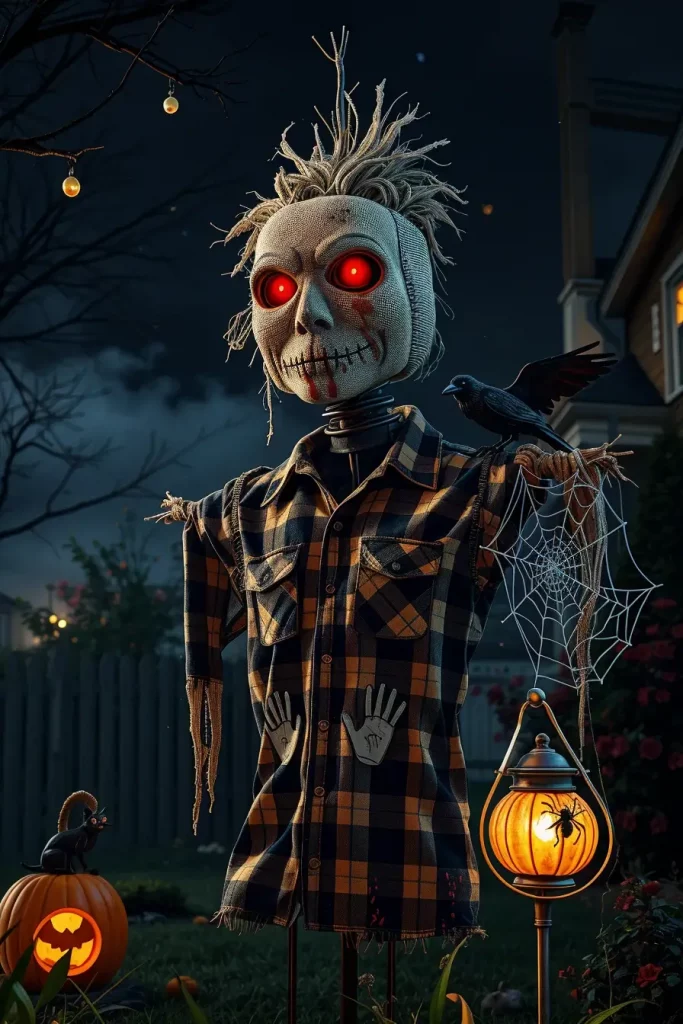
Halloween Scarecrows with a Sinister Edge
I create evil scarecrows as the spine of a front-lawn story: spindly figures protruding out of the ground, outlined by corn stalks covered in cobwebs, a crow on one shoulder and a splash of bloody handprints on the shirt to give the viewer instant discomfort. To build, I like a rebar or 2×2 wood spine driven into the ground and cemented there, then fill out the torso with foam or straw that has been sealed against moisture. I usually cover the bottom with white cobweb and stuff a few skulls in there so visitors find new horrors as they get closer, which are illuminated by low amber path lights and one pumpkin lantern flashing on a timer.

Item by item, I choose flame-retardant burlap for the head (safer than untreated fabric), stitched with thick jute twine to give that “no-face” menace. Button LEDs or battery-powered tea lights placed behind the eye holes make a spooky glow without having to run cords. The garments are second-hand denim and flannel- torn, dirty, and sprayed with fabric-safe black spray to make them look older. I include a wired black cat silhouette close to the feet and occasionally a hanging black spider off the sleeve to give a jump-scare as it swings in the wind.
Based on experience, less is better than more. I have watched designers on HGTV emphasize one focal point in each vignette and I concur: one strong scarecrow with two lesser ones comes across more powerfully than six mediocre characters. I also suggest rustling when motion-detected or a Bluetooth speaker concealed somewhere far enough away to moan.
Were I to do more, I would combine a low fogger at the bottom and ground-hugging RGB lights to change color subtly, green to purple, throughout the night, and a hand-lettered sign warning about the curse of the field to connect narrative to form.
Burnt Witch Effigy: A Dark Tale on Display
I build a witch effigy that looks charred (never burned) by layering flame-retardant muslin, singed with heat-safe paint effects instead of actual fire. The form is mounted on a steel spike frame to withstand wind and rain and the hands are pointing accusingly at visitors as though cursing the property. Around the base, I cluster melted resin “candle with “blood” pillars and scatter ritual circle markings with eco-safe chalk to reinforce the narrative.
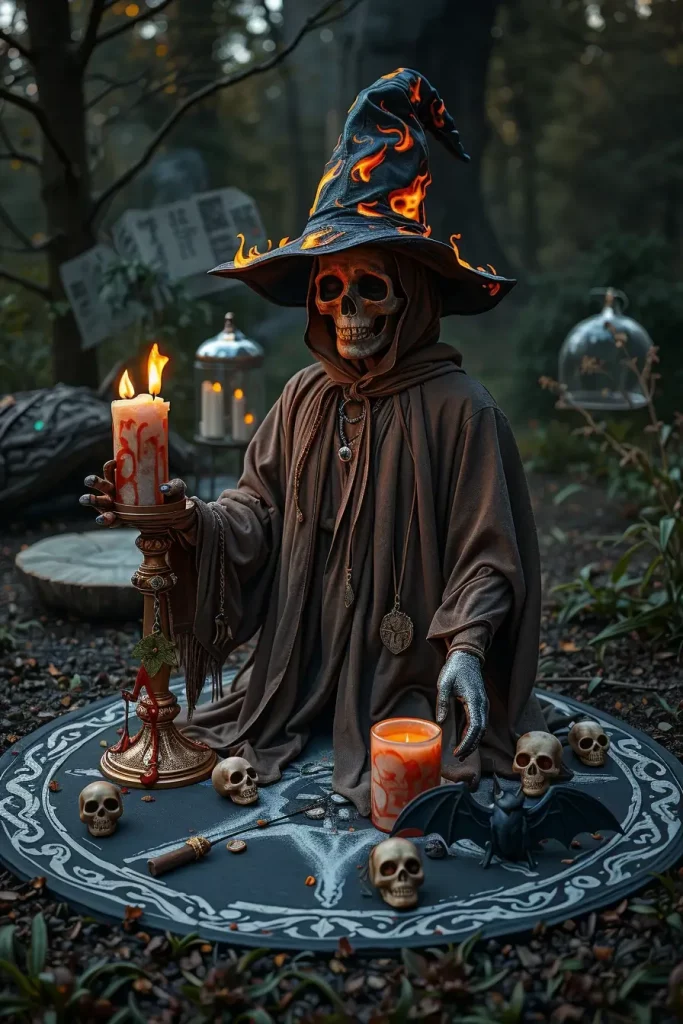
For materials, I prefer a foam mannequin core wrapped in fire-safe batting, then draped with blackened fabric—distressed using a soldering iron tip (carefully) to create holes without real flames. The witch archetype is associated with a pointed hat with burnt edges, but a chain of miniature skull charms and one hanging black bat earring are layered storytelling. I’ll place a wrought-iron kettle (thrifted or resin) near her feet, filled with crimson LED lights to replicate embers.
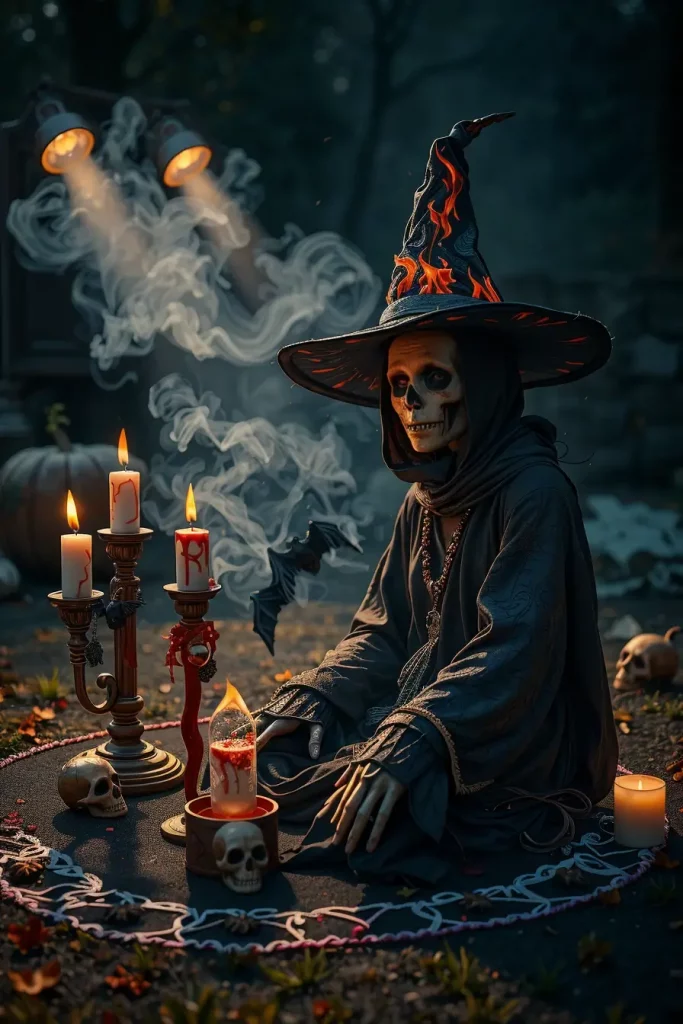
Theatrical prop artists have taught me that texture sells the illusion-matte finishes are much more readable at night as real than glossy paint. I follow that in this: flat blacks, soot grays, ashy whites, so the effigy will pass under spotlights. Add a low audio loop of crackling embers to enhance immersion.
To push it further, I’d include a discreet scent diffuser with campfire aroma (outdoors-safe) and a scripted plaque telling her tragic backstory. Telling stories makes the guests stay.
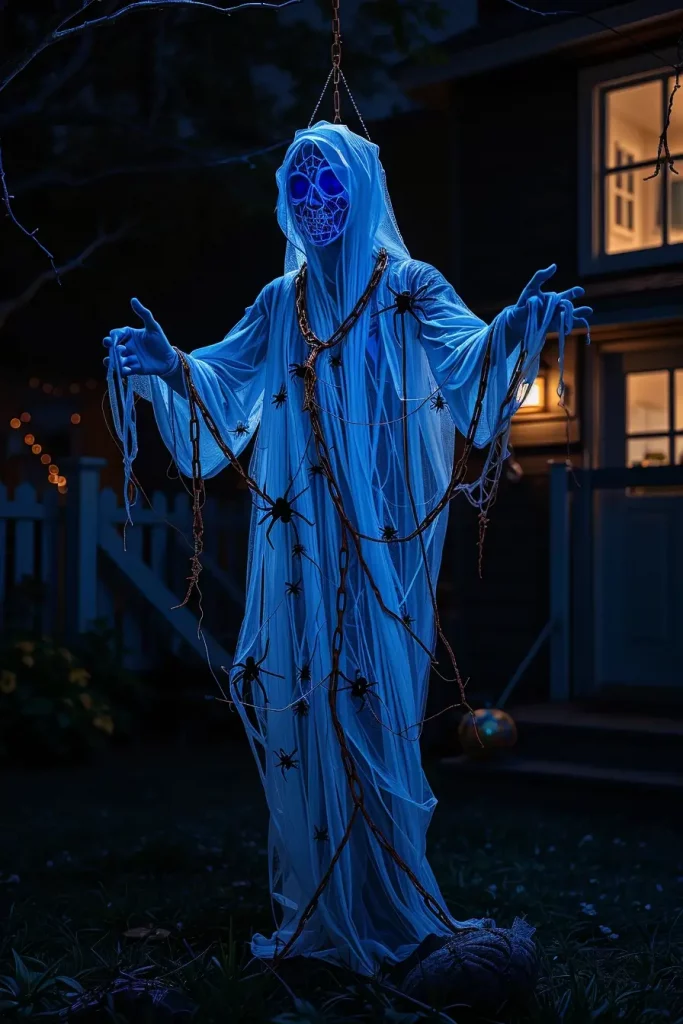
Haunted Ghost Effigy in Chains
In my chained ghost effigy, I am depending on billowing, UV-reactive gauze that will glow under blacklight, and I am wrapping it around a PVC skeleton frame to keep the silhouette humanoid. Rusted (painted) chains bind the torso and ankles, creating a tortured, suspended effect. I hang cobweb of white between the ghost and the posts of the porch, and I put in a couple of half-concealed spiders to be found by close examination.
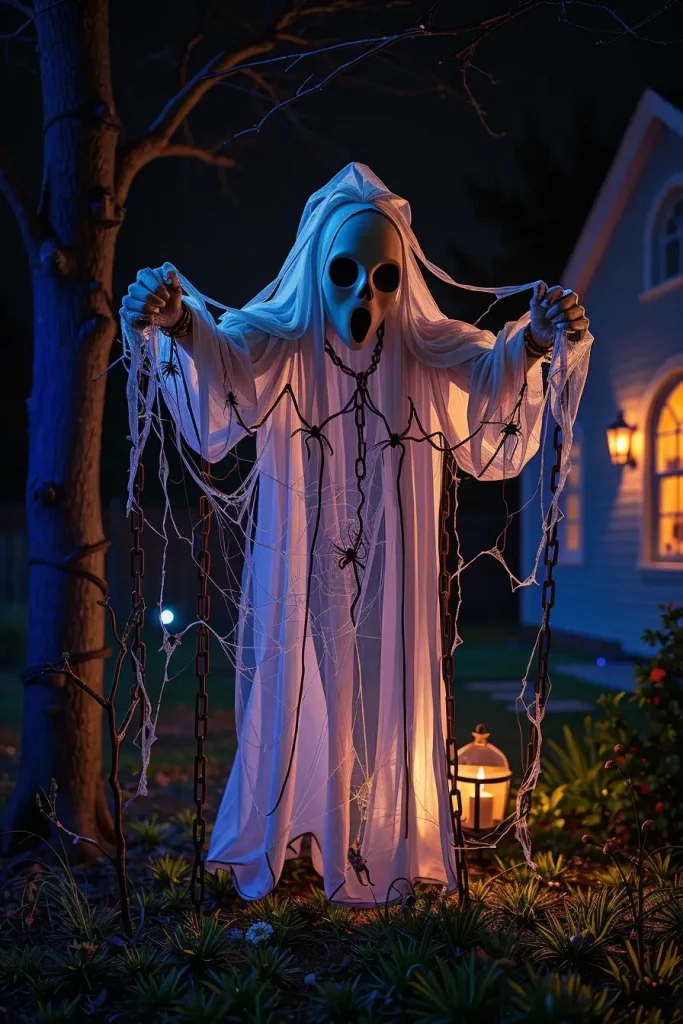
Hardware is important: lightweight resin chains will not weigh your frame down and ground stakes with guy lines will prevent the ghost twisting into a knot during a storm. I introduce cold, blue-tinted floodlights to distinguish this area with warmer, fiery colors of other parts, and a low-power fan to make the fabric move slightly. The creepy detail that can be easily remembered by guests is a small ghost child figure hanging on the main form.
At least, I am afraid of fishing line at eye level; I change to translucent paracord and mark it until the install is flawless to prevent accidents. I also prefer to incorporate one narrow-beam strobe that flashes after every 30 seconds to re-startle those visitors who take too long.
To make the vignette better, I would add a row of half-buried skulls which would look at the effigy, and when the motion is detected in the vicinity of the path, a clanking-chain sound effect would be triggered.
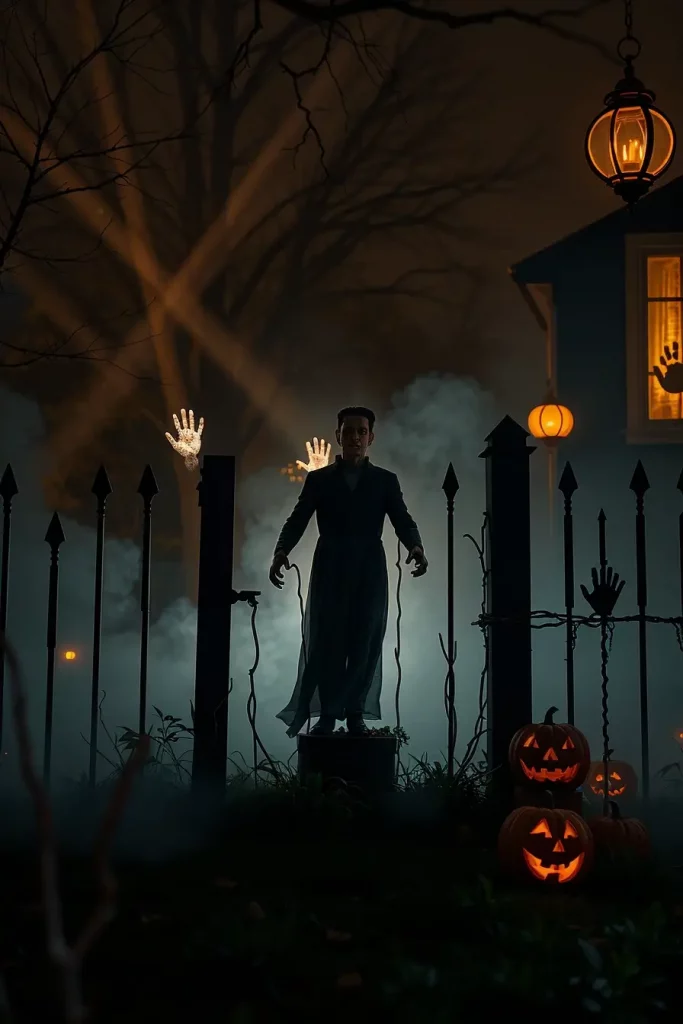
Frankenstein on the Front Lawn: Electrifying Terror
Nothing is more statement piece than a giant Frankenstein in the lawn, surrounded by fake Tesla coils and glowing LED electrodes. I set the figure on a wide plywood platform concealed by faux stone panels, and illuminate it with creepy lime-green floods to enhance the pallor. Around him, I place broken lab crates, scattered skulls, and tangled “wire” (black irrigation tubing) to imply a chaotic reanimation scene.
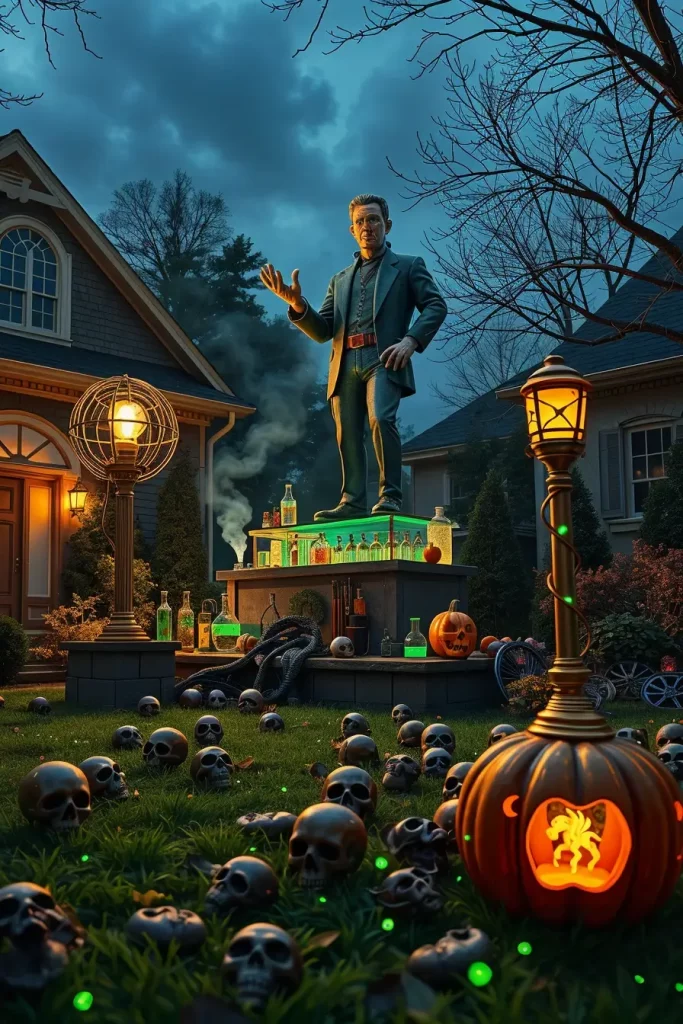
I would want a latex or silicone mask on a foam-filled mannequin to be realistic, and I would match it with padded shoulders and oversize boots to make the proportions look monstrous even when viewed at the street. Subtle head turns or finger twitches can be driven by a hidden 12V system, and are more disturbing than complete animatronics. To match the aesthetic of the lab, I will prepare a table with beakers of glowing resin fluids, and a pumpkin lantern hacked with green LEDs to connect the Halloween tradition to the science-horror scene.
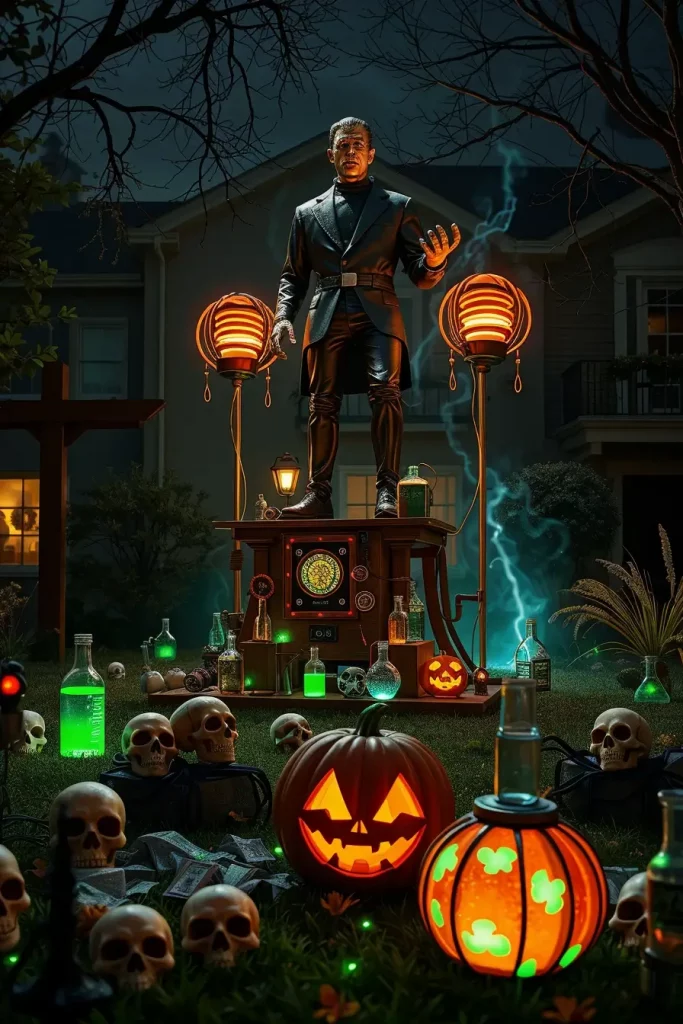
In my experiments, the most persuasive lightning effect is obtained with short, random strobe bursts, synchronized with thunder sounds; predictable pulses are background noise. I also point one cool-white spotlight straight up to cut dramatic shadows into the stitched face of the figure.
To increase the immersion factor, I would include a clipboard with lab notes stuck in the ground, a burned witch doll label to suggest that she was a previous experiment, and a Do Not Resuscitate sign half-buried, with some bloody handprints on it.
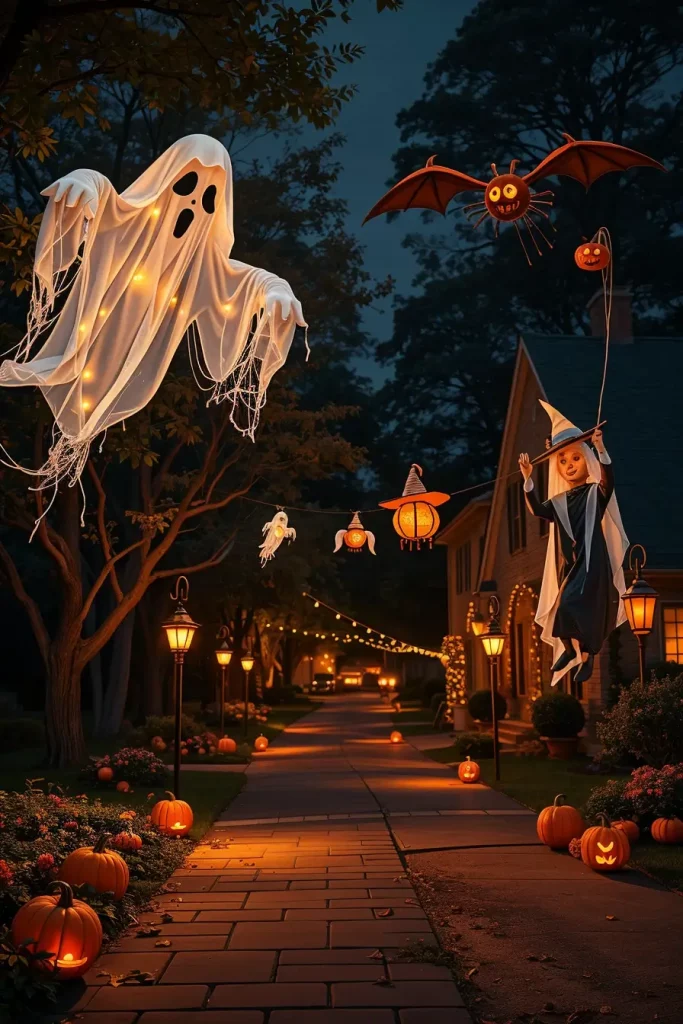
Witch Hats Hanging From Trees: A Bewitched Sky
Suspended witch hats are budget-friendly, high-impact, and fast to install: I hang them from monofilament (or thin paracord for safety) across branches so they “float.” To make them part of the larger yard I sprinkle black bat shapes and one crow sitting on a branch, and white cobweb lines made between trunks to give some texture. The warm micro-LEDs embedded in each hat create the effect of that floating lantern without tangles of cords everywhere.
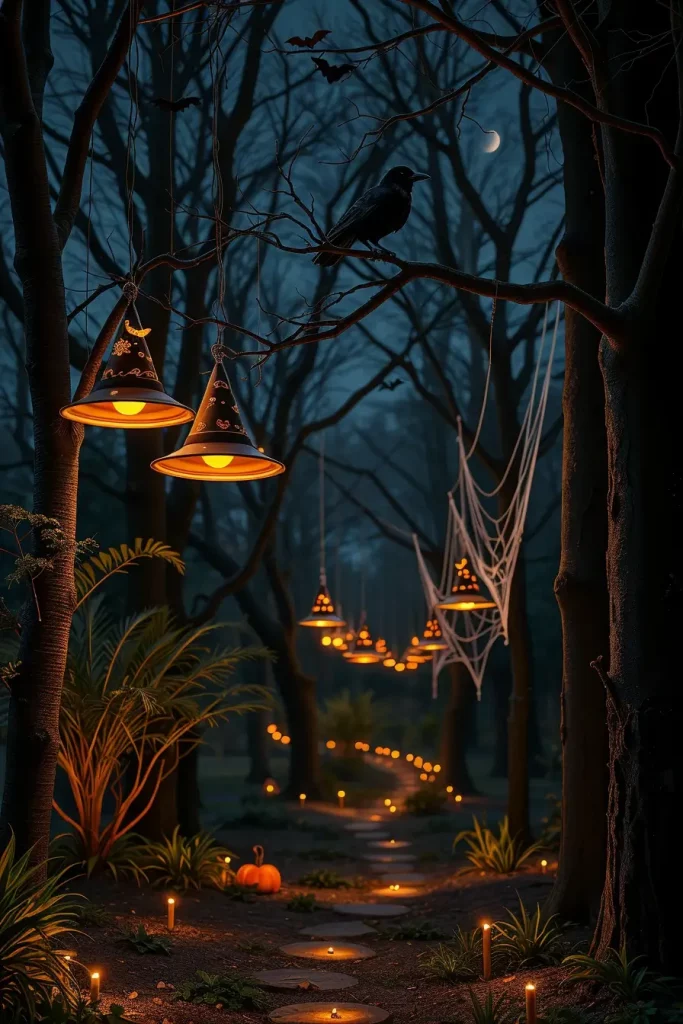
I purchase light felt hats and put thin floral wire around the brim to keep it firm in the wind. A small battery puck light sits in each crown (Velcro is your friend), while a hidden hook anchors the line to the hat interior. I like to mix classic black with one or two aged, mossy variants to give the “coven” some hierarchy, and place a faux spellbook open on a nearby stump, stained with faux wax from a candle with “blood” effect.
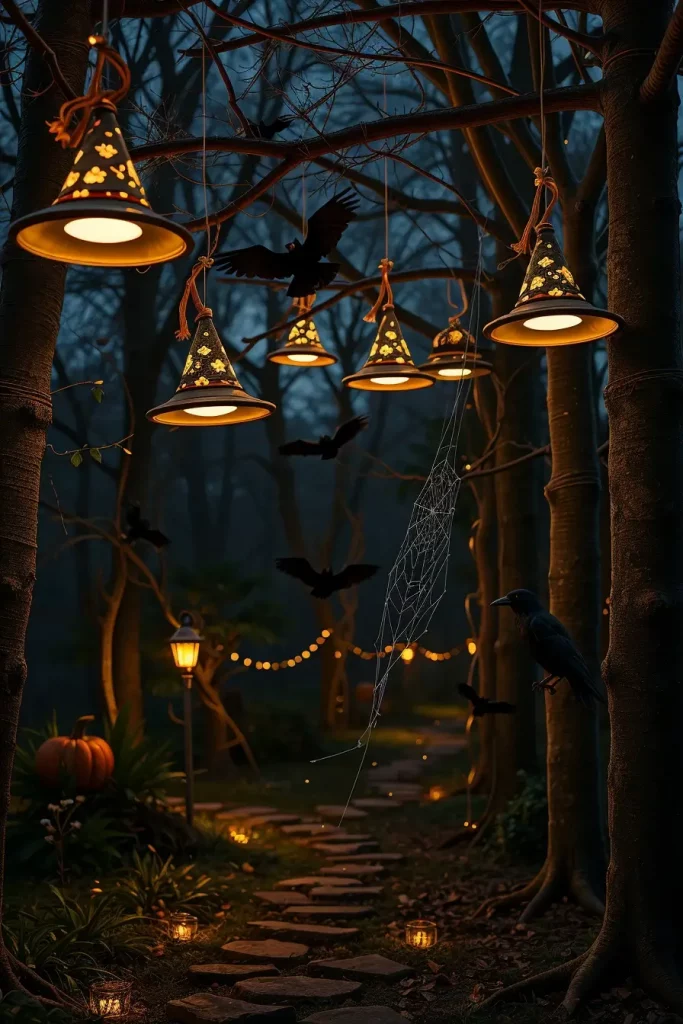
As HGTV stylists are fond of reminding us: repeat motifs to make rhythm. I echo that by repeating hats in odd numbers (5, 7, 9) and extending the line across the property so guests “follow the magic.” It will automatically direct people to your primary scare scene.
What’s missing? Wind chimes tuned to eerie minor intervals hidden in the canopy, and a whisper track (looped ambiance) to make guests look up, hunting for the source.
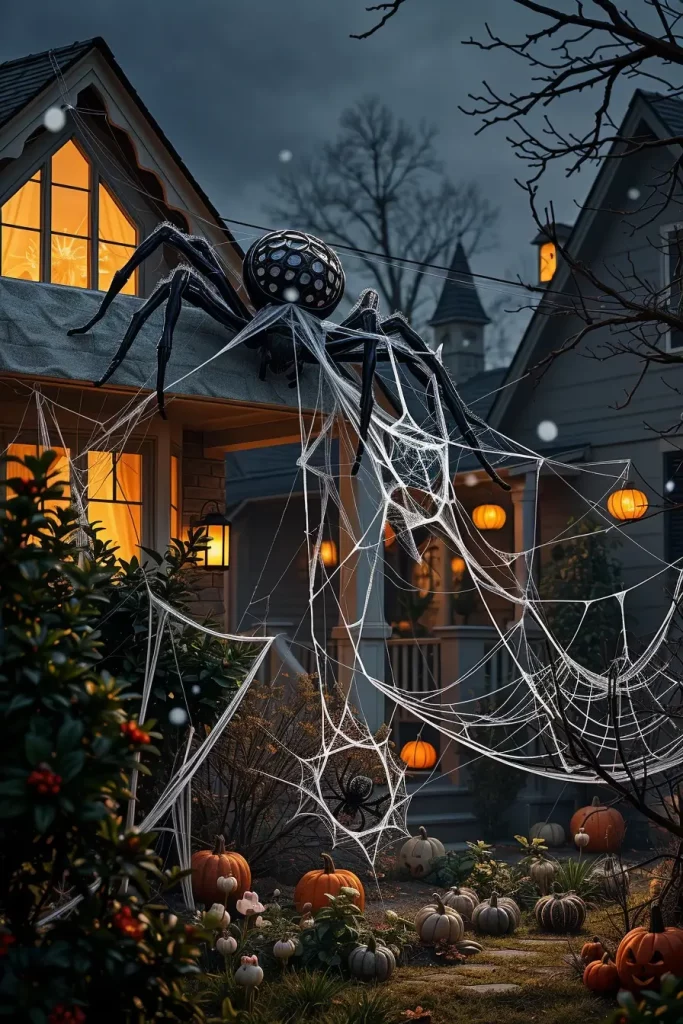
Giant Black Spider Nest: Oversized Arachnid Drama
A giant black spider mother and an egg sac are a spectacle when they occupy a corner of a porch or a fence. I curve PVC into legs, cover with pipe insulation and cover with matte black fabric or Plasti Dip to make them weatherproof and look realistic. The nest itself is batting and elastic white cobweb, and through this dozens of smaller spiders and one old doll, caught in the act, make their appearance, a fact that always gives people the creeps.
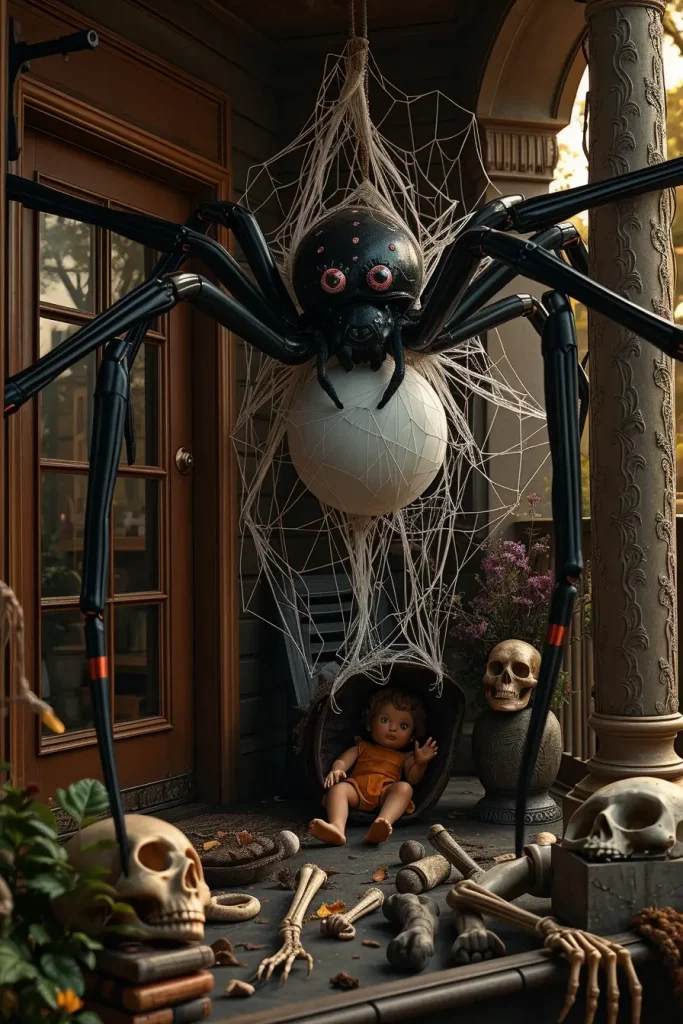
In the case of the body, I have a lightweight foam sphere to represent the abdomen and a smaller one to represent the cephalothorax, which is painted dark with small gloss highlights around the joints to indicate chitin. The eyes have LEDs that are a sickly red and I frequently attach a motion sensor to cause a brief twitch of the legs. A nest of bones–skull, skeleton hands–beneath implies many, many meals.
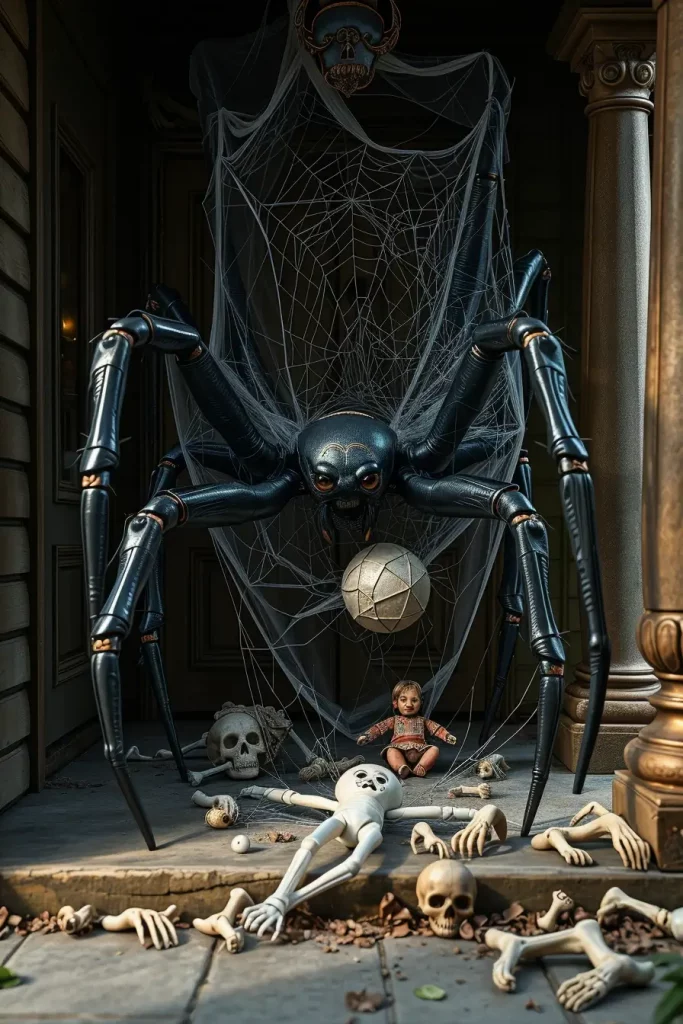
Professionally, I’ve found that anchoring two legs to the ground (with stakes) and two to a wall dramatically improves stability in storms. In addition, do not place egg sacs on the ground to prevent moisture wicking and make them appear more threatening.
The upgrade would be to mist the sac with UV fabric paint to make it glow under blacklight, and a slight crackling skitter sound under the deck, timed to your steps on your walkway.
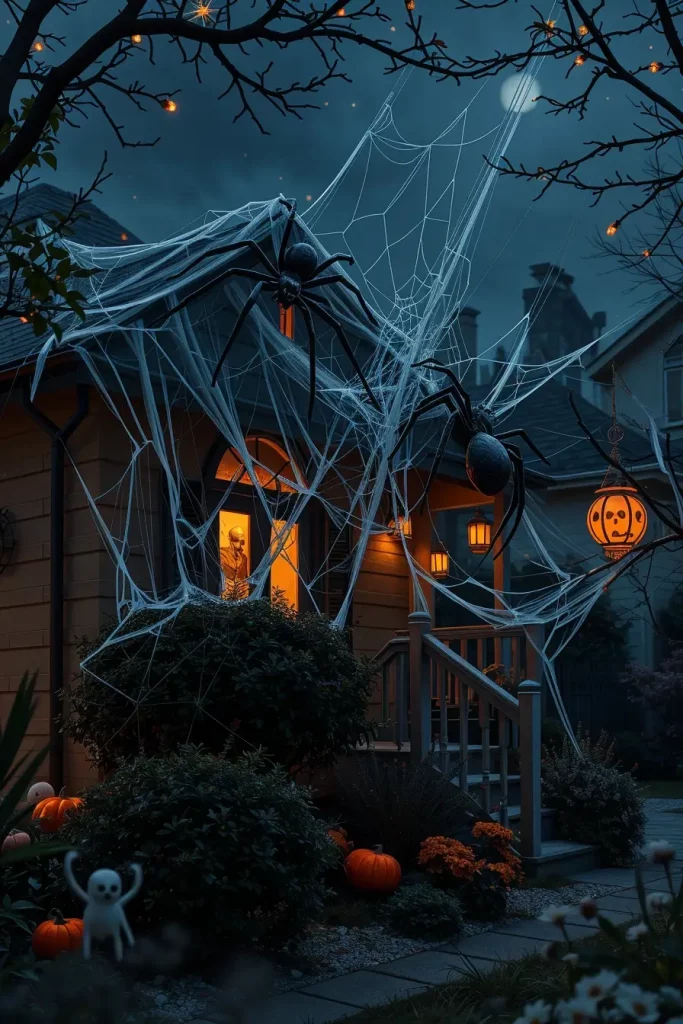
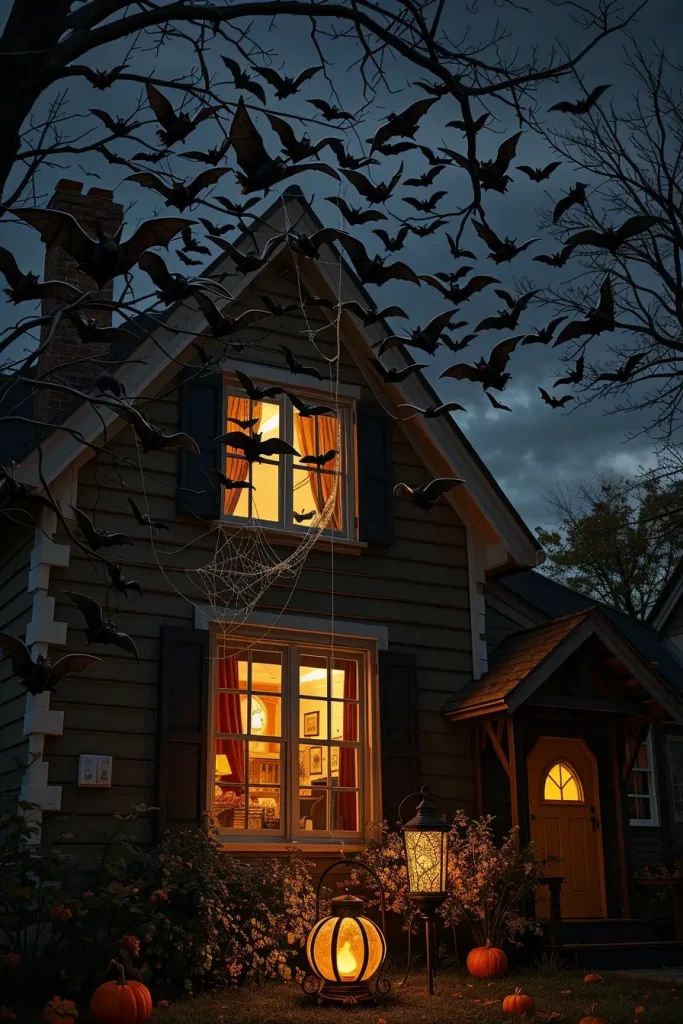
Black Bats in Flight: Suspended Nightmares
I enjoy making a flock of black bats which come out of a window or chimney and fly in a curve across the sky to a tree. I hang them in different heights and angles using monofilament on EVA foam or corrugated plastic cutouts so they freeze in mid-flight. I toss white cobweb over the launch point, and sit a solitary crow like a bird of ill omen, and a pumpkin lantern at the bottom to give warmth to the cold figures above.
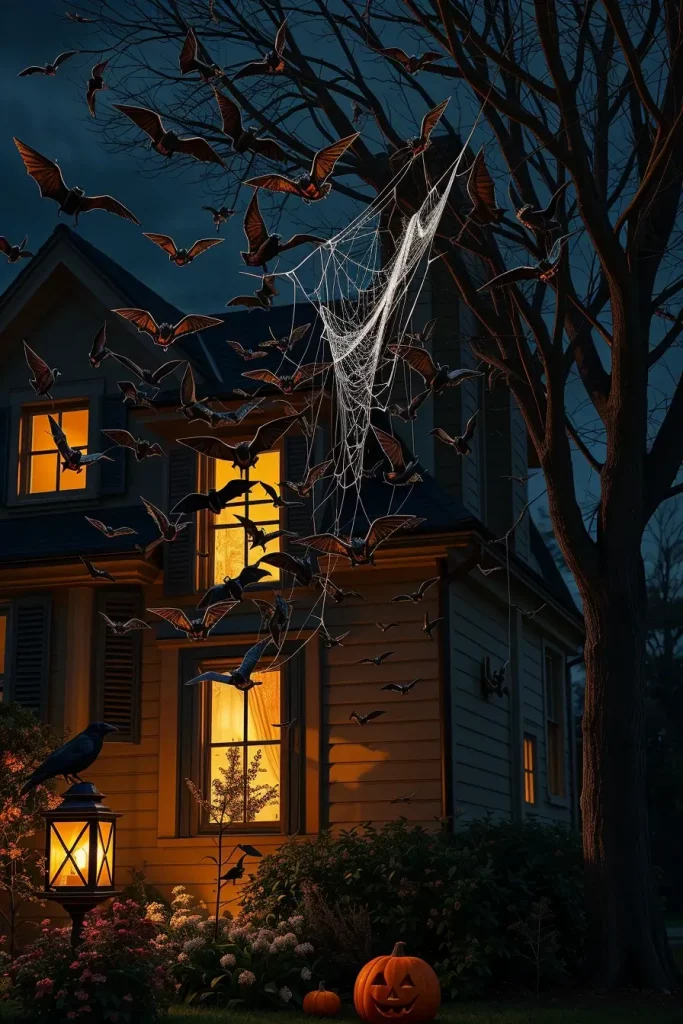
All the bats are covered with exterior-grade matte paint to resist dew and frost. I vary sizes (6–18 inches) and adjust wing bends so some appear to bank or dive. A low-angle spotlight creates dramatic shadows on your house facade using a narrow beam spotlight- half the job is done by the shadows. I occasionally put a little black spider dropper in the same line of view so that when guests scan the swarm they are ambushed by movement down below.
The visual composition of design pros refers to motion lines; the curve of the bats here is that line, so I sketch the line first with chalk on the ground to plan anchors, then I install the furthest point back to the house.
What I would do: a bit of a projection of a moon or drifting clouds to provide context to the swarm, and one, oversized bat at the end of the arc to serve as the alpha and finish the story beat.
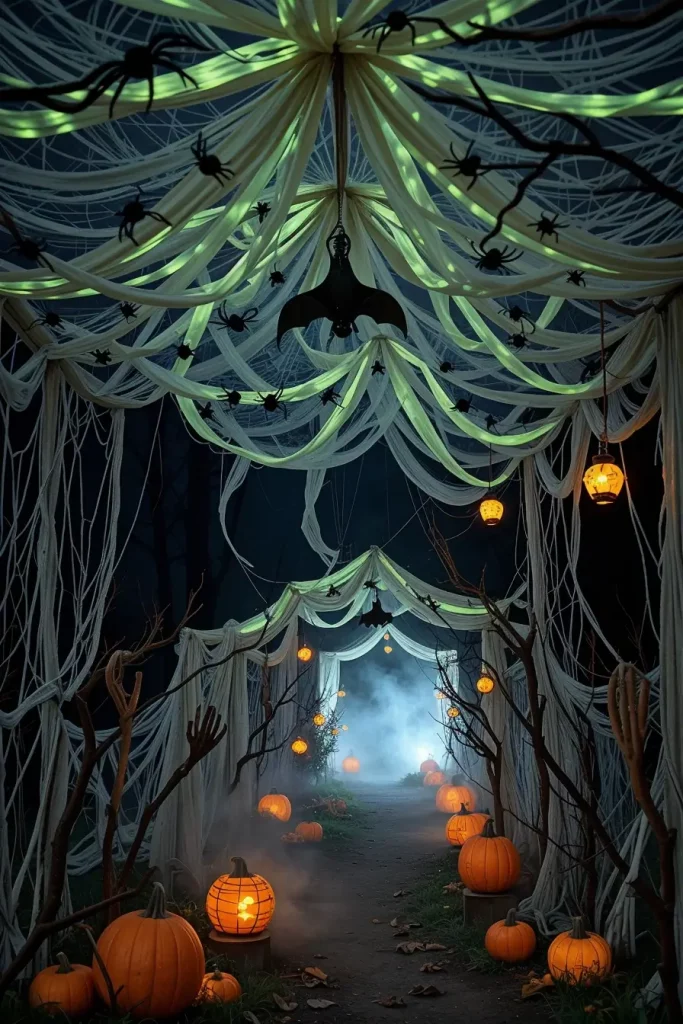
White Cobweb Maze: Ghostly Paths and Hidden Frights
I make the front yard a maze of white cobweb so that guests have to brush against silky strands as they avoid hanging black spider clusters and floating wisps of ghosts. To ensure it is solid in the great outdoors, I plot sightlines and walking paths, and then I install professional-grade webbing between shepherd hooks, trees, porch posts, and temporary PVC arches. The maze is illuminated by strategic uplights and shadows of a suspended black bat or a half-buried skeleton hand leap out of the sides. A couple of pumpkin lanterns on the ground level lead the way without ruining the immersion.
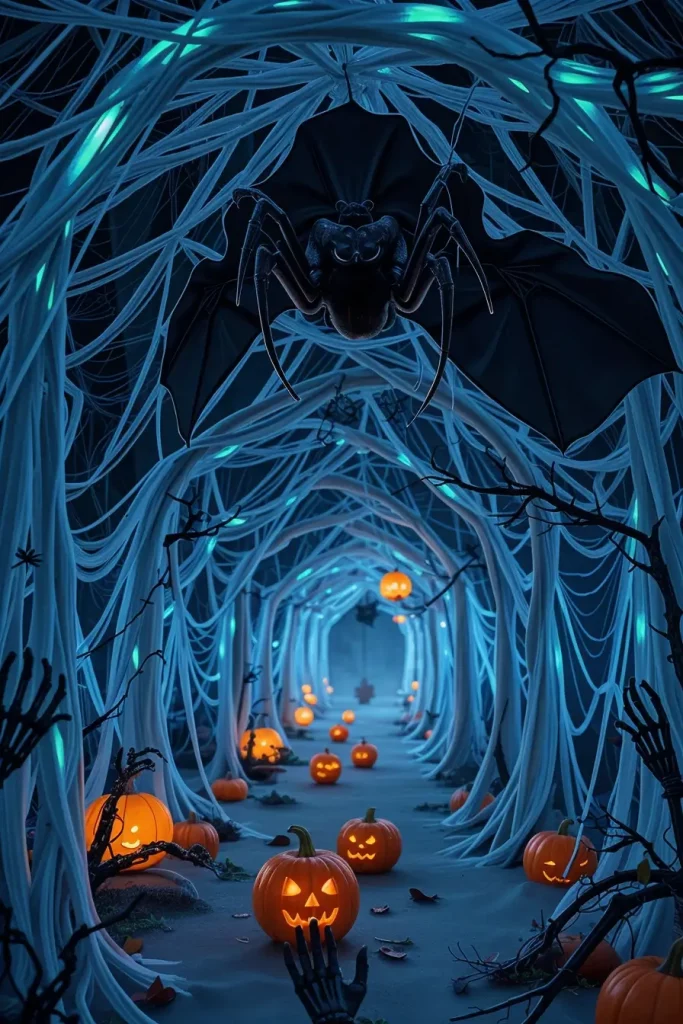
My materials list always includes UV-reactive webbing (it pops under blacklight), nylon zip ties, and nylon fishing line for tension. I alternate foam skulls, a shredded witch shawl tangled in the netting and the sticky strands that grab the eye before they grab a sleeve. At turns, I hang resin “candle with “blood” pillars in lantern cages for safe, wind-proof glow, and add a lurking crow perched above a choke point—because people always look up when they feel trapped.
Over the years of conducting walkthrough haunts, I have learned what scenic designers of major theme parks emphasize: alternate compression and release. Narrow the cobweb corridors, then open to a sudden clearing with a scare prop (a jerking ghost effigy or rattling chain). That beat maintains the adrenaline cycle.
What’s missing? I would include chittering spiders that move when you move and are low volume and a laser swamp effect that cuts through the webs to create a surreal floating-fog effect. My last, memorable detail would be a lone, dimly glowing old doll in the middle of the maze.
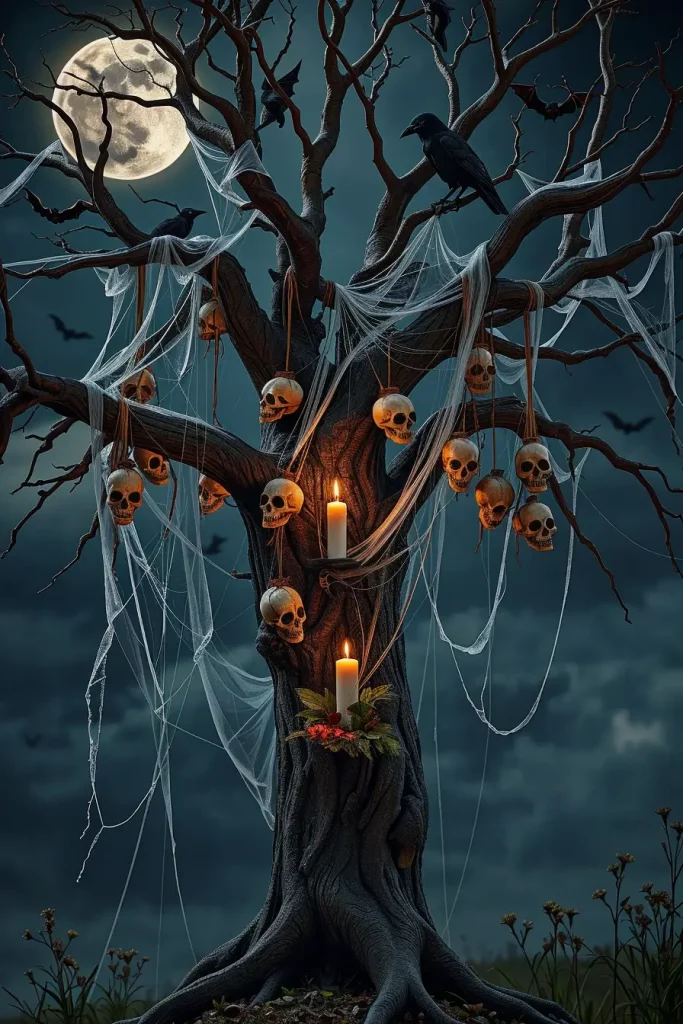
Haunted Tree Decor: Gnarled Limbs and Hanging Horrors
I treat each mature tree like a vertical stage: draping cobweb strands from limb to limb, hanging mummified bundles, and suspending skull clusters with dripping faux wax from a candle with “blood effect. I stake a witch dummy or Halloween scarecrow to the trunk, and allow roots to “grab” their feet with foam wraps painted to look like bark. Above, black bats and a somber crow make the canopy a hostile sky.
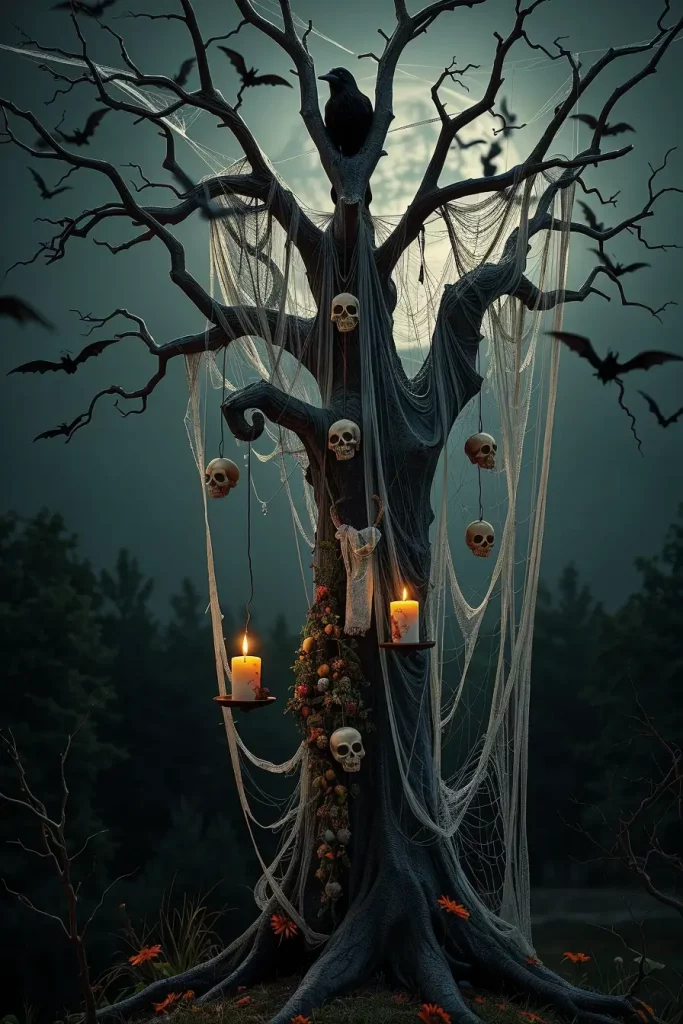
Each detail has its place: burlap-covered foam bodies to create silhouette shocks, resin skeleton hands groping out of knotholes, and UV-painted white cobweb that looks like moss of the dead. I will put in a flicker bulb close to the trunk and a concealed green spotlight behind it so the bark will appear diseased. The tableau is completed by a crouched black cat cutout at the base, and frames photos.
I concur with Architectural Digest when it says, repeatedly, about layering light: several low-wattage lights are preferable to a single blinding light. In this case, I cross-light on two sides to overemphasize the texture of the bark and to make my hanging props have a dimensional and cinematic look.
To take it a step further I would include a low speaker mounted on a tree that would play the sounds of creaking wood and distant whispers. The shadow of a shivering ghost child behind the trunk, every few minutes, would make people swear the tree was moving, either with a servo or with a simple rotating cam.
Fog Machines and Strobe Lights: Haunted Effects in Motion
I use fog to add depth, diffusion and drama; even cheap props look expensive. I set low-lying fog machines behind tombstones, porch steps, or behind shrubs, and use short, irregular bursts of strobe to simulate lightning without blinding the eyes. The beams reflect in the fog with the right angle, showing spiders, witch hats, and ghost figures in and out of sight as the guests move.
Selection-wise, I opt for chilled foggers (or fog chiller boxes with ice) to keep haze hugging the ground. I put strobes behind Frankenstein or a giant ghost effigy and every flash captures a frightening silhouette. To strengthen the scene I sprinkle handprints of blood along a fence and leave a pumpkin lantern burning steadily–warmth amidst the flickering lightning.
The professional haunters will tell you that control is better than intensity: put strobes on a timer or DMX controller, and have several smaller-output foggers instead of one huge cannon. I have been doing that advice over several years; it makes the visibility usable and the effect breaths naturally.
What’s missing? A narrow laser fan to cut a veil of light through the fog to show only what is in it, excellent to startle black bats or lunging skeleton prop. And never forget to carry a small, battery operated secondary light in case of dense fog engulfs your key targets.
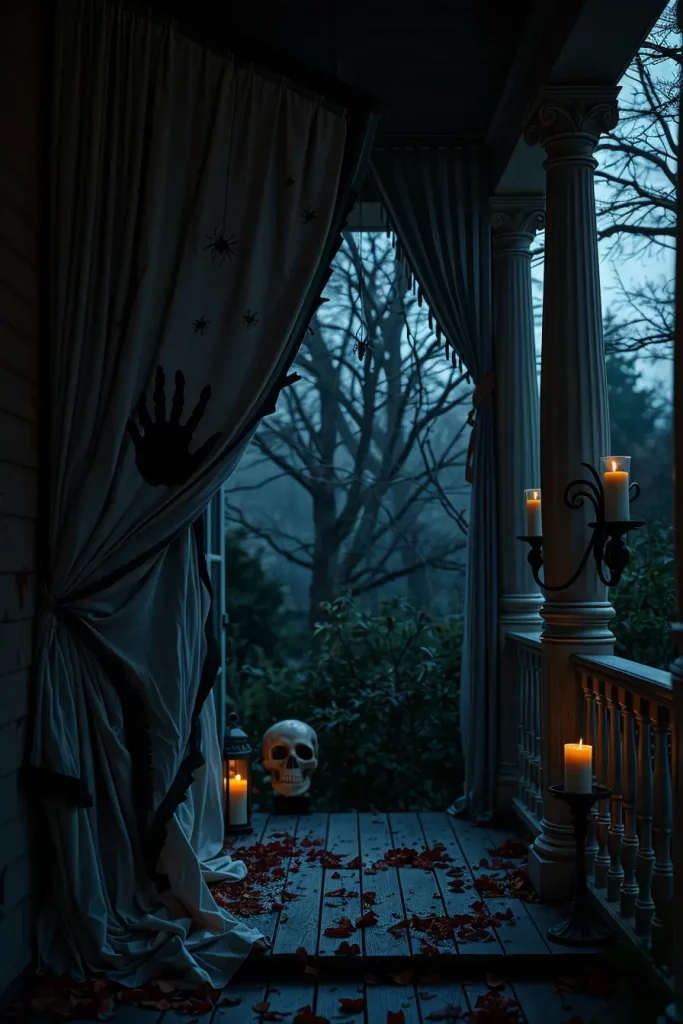
DIY Bloody Drapes and Curtains: Macabre Fabric Ideas
I hang weatherproof fabric panels (treated drop cloths or outdoor polyester) across porches, gates, and pergolas, then “stain” them with fabric-safe red dye to create convincing bloody handprints and splatter. The rot is augmented by rips, singes and threaded cobweb fibers. The curtains curl when the breeze strikes, to show secret skull profiles, a gripped aged doll, or a spindly black spider that sits on the edge of a tear at eye level.
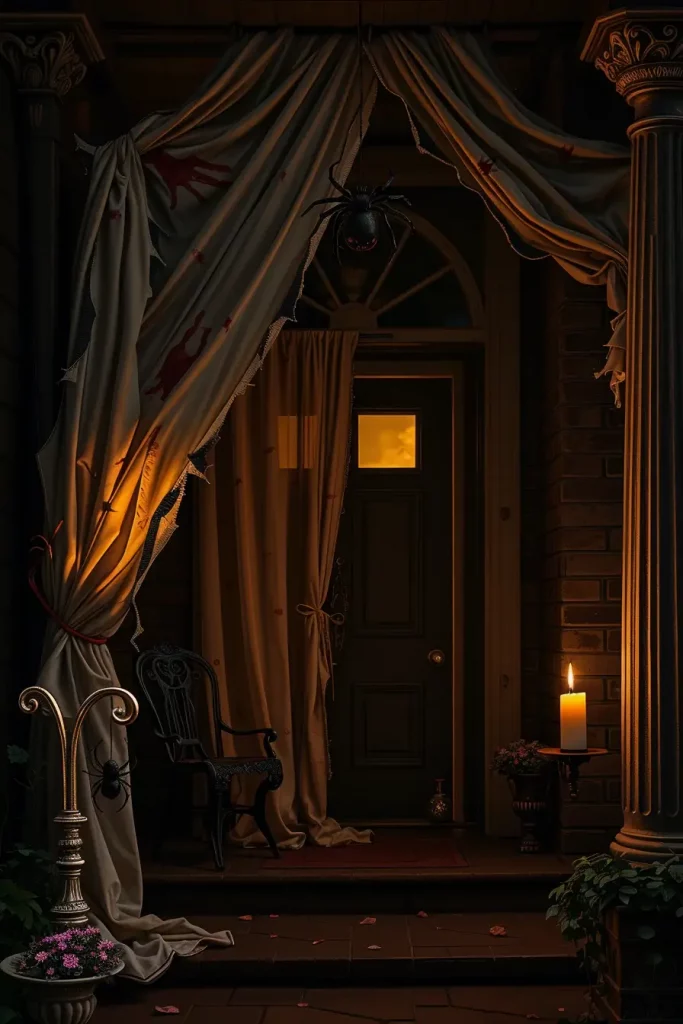
I fix every panel with grommets and paracord to prevent the wind blowing them off, and I tend to put some lightweight PVC in hems to add structure. Between drapes, I tuck flicker bulbs and tiny resin “candle with “blood” sconces for a red, pulsing glow. A silhouette of a crouched witch behind one of the panels, which is hardly illuminated, makes a double-take effect when the guests walk past.
I have learned the rule of asymmetry and negative space, or leaving a few panels unadorned to make the stained ones pop, through my stylist friends who do horror set design. It makes the eye move and speculate which curtain conceals the scare.
To complete it I would introduce UV-reactive splatter on some of the panels, a low fan to make them move slightly, and a motion sensor that would make a quick, tearing-fabric sound effect and a flash of a ghost face behind a slit.
Tombstones and Graveyard Sets: A Lawn of the Dead
I set up a mini cemetery with depth of layers: foreground crosses, mid-ground headstones and background mausoleum facades, all at a slightly crooked angle to appear natural decay. Moss, white cobweb, fallen leaves, and scattered bones (especially skeleton hands clawing upward) make it tactile. A single lantern of pumpkin shines over the grave of a beloved witch, and a broken skull is placed next to a cracked slab with bloody handprints.
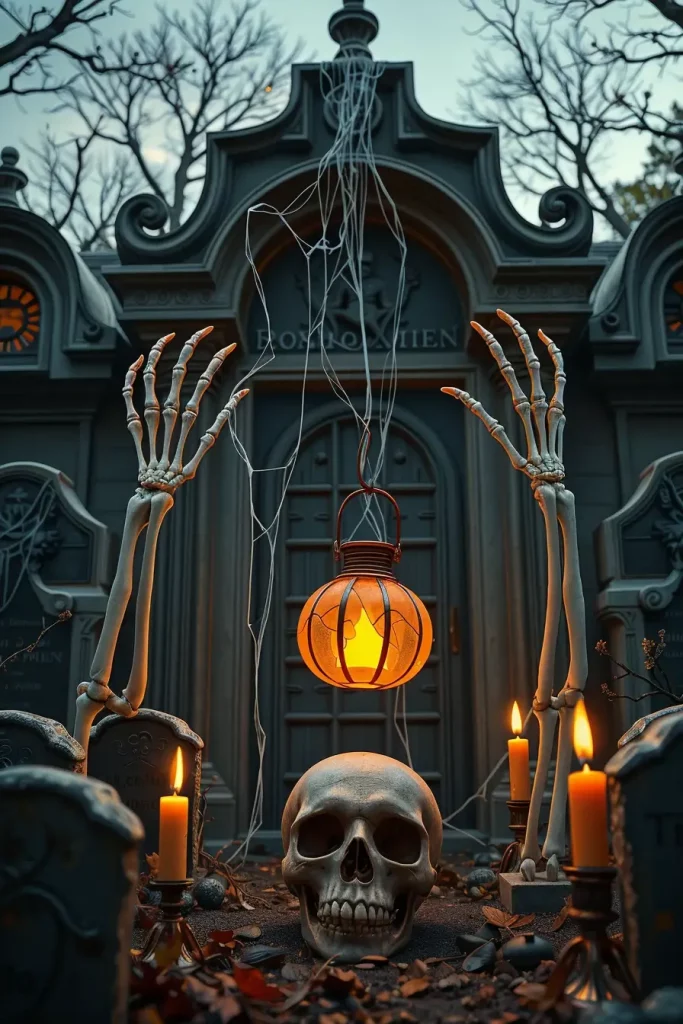
It is all about materials: the high-density foam is sealed with exterior paint, which does not warp, and rebar stakes through the bottom ensure that tombstones do not fly away in autumn winds. I add epitaphs that hint at your other vignettes (“Here lies the witch effigy—justice served, or not?”) and mount a crawling black spider on one stone, a brooding crow on another.
Professionals in the industry recommend cool white backlights and warm foreground candles to provide a cemetery with that layered, cinematic light. I do abide by that rule, and occasionally steal in a dim, throbbing underlight to give a buried heart effect beneath one mound.
I would add a half-submerged Frankenstein laboratory panel, suggesting new experimentation, and a ghostly projection of a sad face floating between rocks on a loop. End in low-lying mist to melt the boundaries of reality.
Creepy Crawlies: Insects, Worms, and Slimy Touches
I prefer the gross-out: rubber centipedes, squirming worms in resin goo, and glittering beetles on porch railings and steps. I have a habit of putting spider-webs full of little spiders, and clumps of maggots in the crannies of a skull, or in the eye-sockets of a hanging skeleton. It is subtle, however, when the guests detect it, they flinch, and that is the idea.
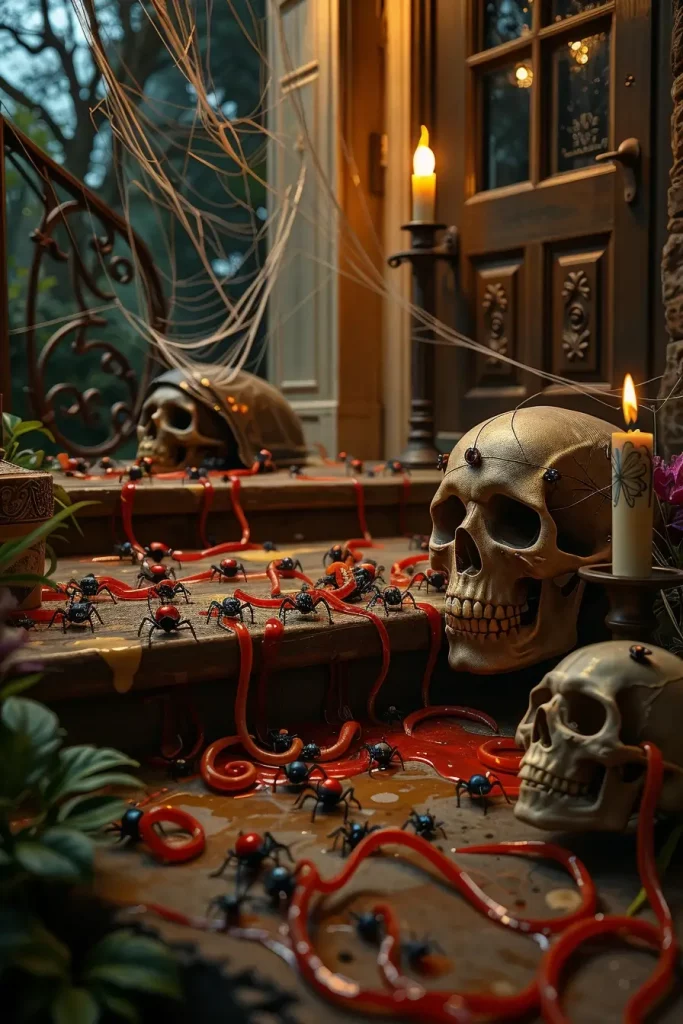
I use weatherproof silicone or latex critters, and gloss-coat them, so they appear wet under spotlights. I’ll stage a tipped cauldron (callback to the witch) leaking fluorescent slime down the steps, with slimy trails (hot glue + paint) leading to a half-crushed black bat silhouette nearby. A single candle with “blood” flickers on a ledge, highlighting the crawlies without blasting the scene.
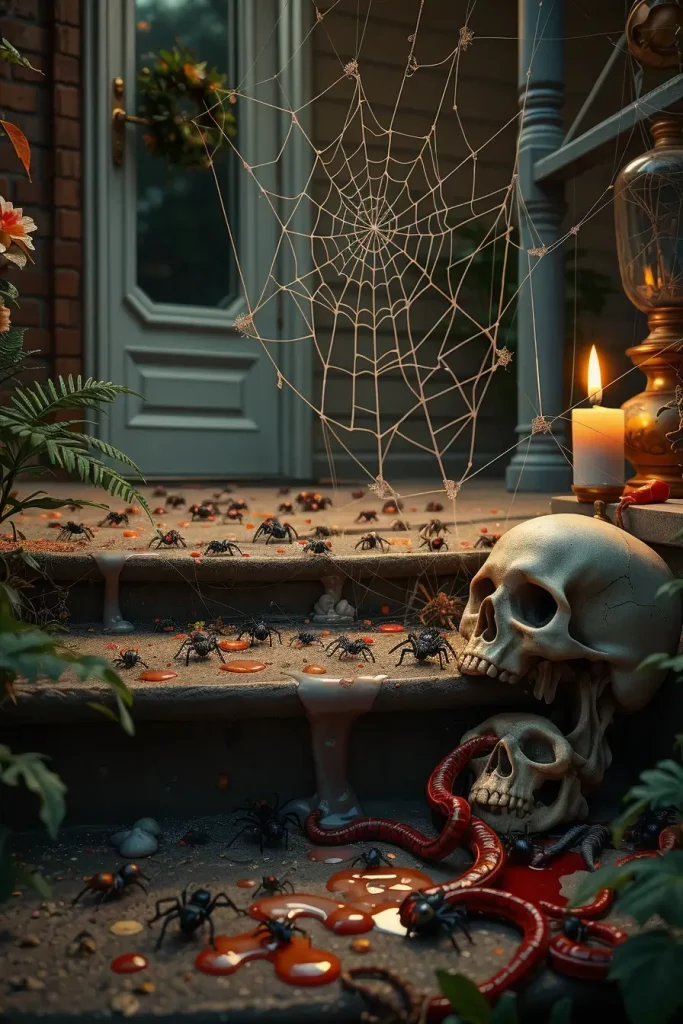
Haunters will tell you, that, if it looks touchable, someone will touch it, so I wrap up important items in clear adhesive or fishing line. I also change scale: combine normal-sized bugs with a few that are grotesquely oversized to provide an unreal, dream-logic shock.
To complete the tableau, I’d add a softly vibrating floor mat near the bug cluster (battery pack hidden) to imply movement underfoot. The disgusted delight would be capped by a motion activated low rumble or scuttling SFX.
Possessed Puppet Display: Chilling Animated Dolls
I clump together a collection of broken, blinking puppets and ancient dolls on rocking chairs, crates and swings, all of them slightly moving, heads ticking, eyes flickering, or one chair rocking by itself. I surround them with strips of peeling wallpaper and white cobweb, and put a miniature effigy of a ghost in the midst of them, as their chief. A child-height pumpkin lantern with oozing candle with “blood” wax gives them a focal altar.
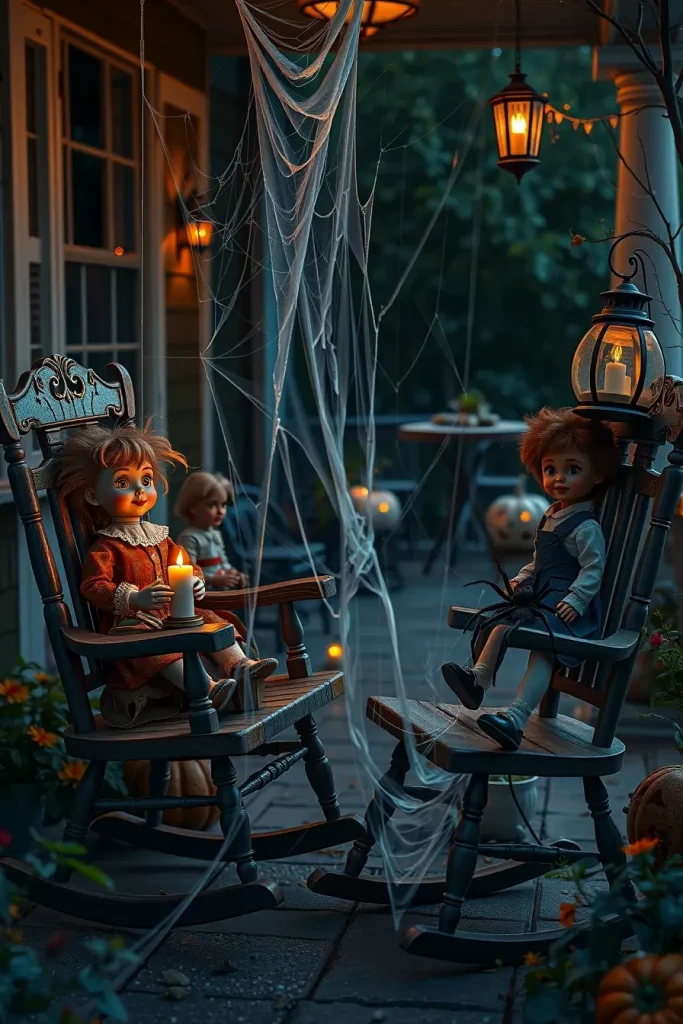
Every puppet is assigned a purpose: a black spider sitting on a shoulder, a skull held like a toy, a rag-dressed witch marionette with one of its eyes missing. I also wire micro-servos or inexpensive motion toys hacked into the doll bodies to make creepy, jerky movements. There is a silhouette of a black cat at the entrance who watches over like a guardian.

I borrow the rule of uncanny valley pacing, which I learned from prop masters I worked with: motions should be minimal, slow, and a bit off-beat. Rapid or continuous animation is cheap and soon loses tension.
As a final touch I would include an old transistor radio shell with a Bluetooth speaker inside playing nursery rhymes out of tune, and a projection-mapped shadow play behind the dolls, where they move in ways they do not in real life, and the guests will swear something is wrong, which is precisely the point.
Haunted Mirror Illusions: Outdoor Reflections of Fear
One of the most outstanding concepts is to incorporate the haunted mirror illusions into your outdoor arrangement in 2025. I have applied reflective panels on garden paths, walls on porches, and gates to give a creepy atmosphere. They are easy to put up but so effective. Together with flickering lights and heavy white cobweb they are immediate fear-inducers. These mirror illusions give the effect of something looking out of the glass especially at entry points. It is a minor but very powerful method of inducing mental discomfort.
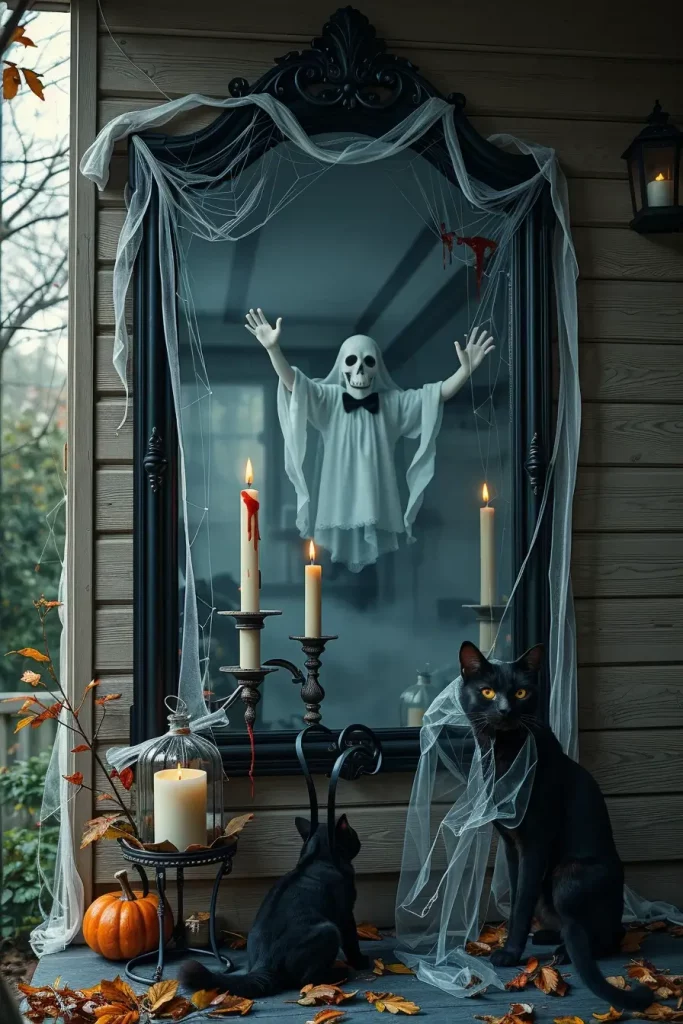
To make the illusion stronger, I surround the mirrors with elegant black window frames or old furniture items that can be used as a mirror frame. I like to surround the mirror’s base with black cats, antique lanterns, and a strategically placed ghost effigy draped in tattered white gauze. I even have a small fog machine to make the reflections a little bit distorted, as though they are haunted. Adding soft flickers of candle with “blood” effect candles beside them increases their supernatural quality.
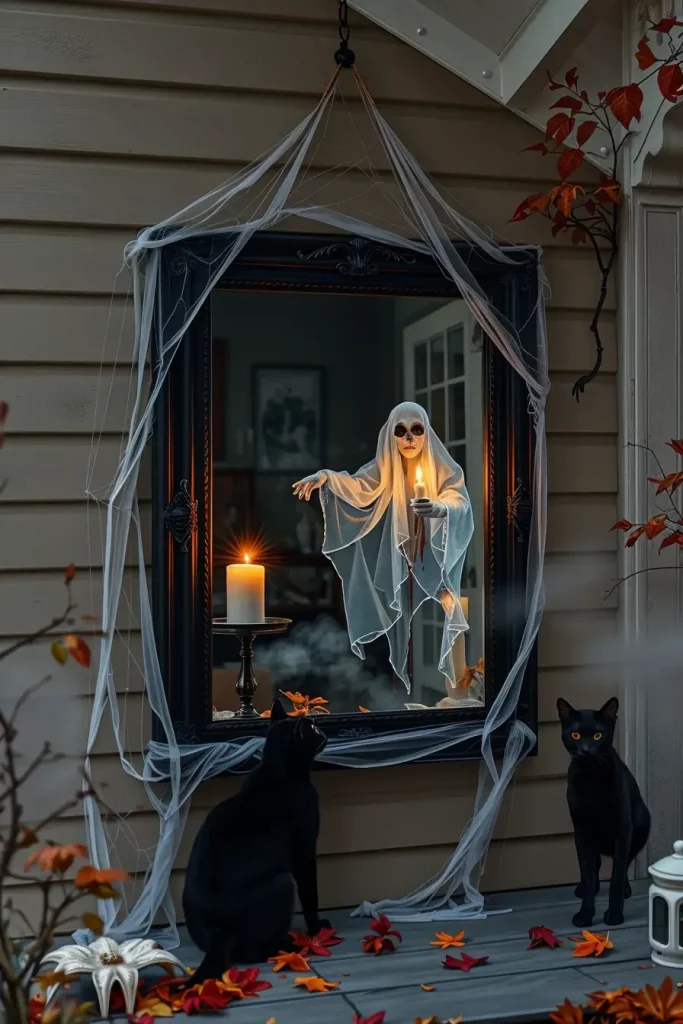
I discover that the presence of a witch effigy beside the mirror adds to the feeling. It makes me think of horror movies in which mirrors are used as gateways. Architectural Digest claims that the psychological aspect of Halloween decor is enhanced by reflective symmetry and optical illusions. That realization proved my hunch right, this basic mirror concept works better than costly animatronics when properly utilized.
And one more thing I would add would be low-pitched motion-activated whispering sounds that occur when you are close to them. That sound layering would finish the haunting effect and leave the corner of the mirror memorable.
Screaming Door Mats and Motion Sensors
My default in 2025 when designing entrances is to incorporate screaming door mats and motion activated features. These interactive devices are a mixture of scares and surprise. I tend to put mine on the front porch, with a faux moss and bloody handprints and a broken skull prop. They are great to set the mood even before a person knocks. These mats are also weatherproof, which means they are also usable on any type of porch.
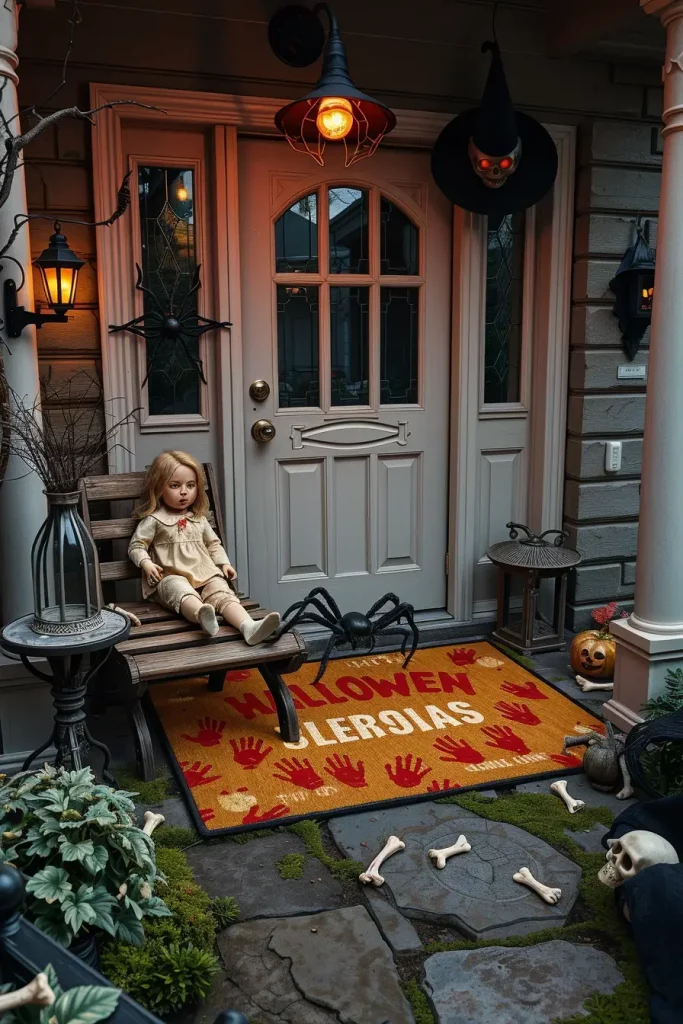
I complete the mat with a wooden bench having old doll figures seated rigidly. Next to the bench, I put a potted plant, which is in fact a motion-activated black spider, which jumps when it is activated. I add witch hats hanging down, and even little hanging bells that clang creepily in the breeze. Under the bench, I usually leave some artificial bones or half-buried skeleton feet, which adds to the creepiness even more.
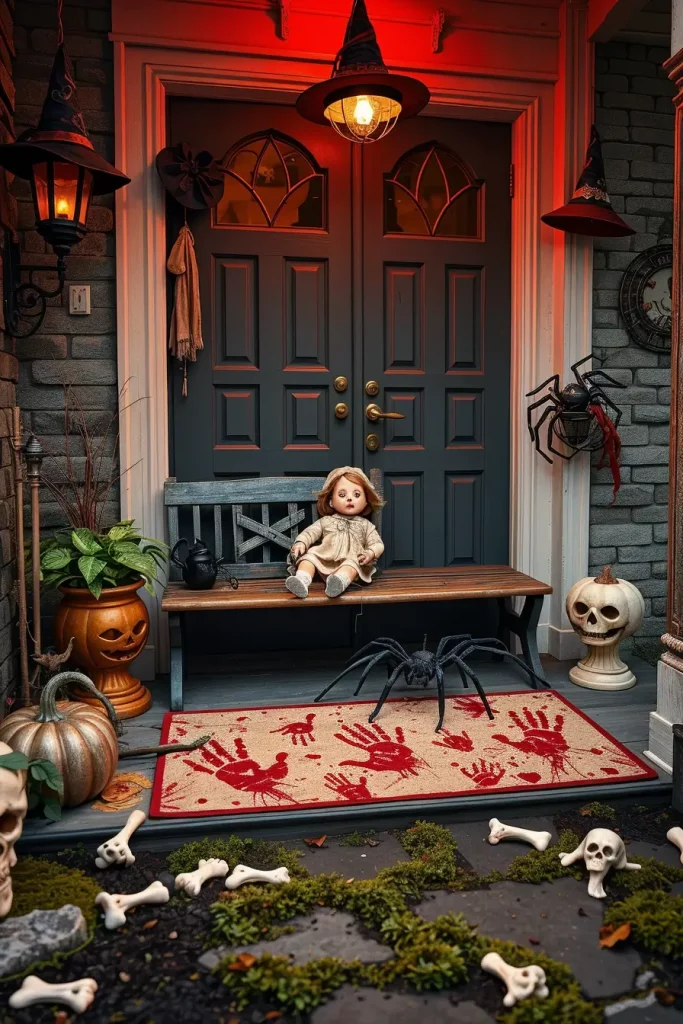
My experience as a person tells me that it is the mixture of the expected and unexpected that is really scary. Combining passive and active decorations increases engagement and surprise as Better Homes & Gardens recommends. That is why the combination of screaming mats and the decor that looks innocent, but is not, is always a successful decision.
To enhance this further, I would suggest the use of small LED spotlights of red color to illuminate the bloody handprints. This attracts attention and creates a suspense prior to the scare itself.
Demon Face Door Covers and Sinister Smiles
A front door can make the whole atmosphere of your Halloween. That is why I prefer to use the large-scale demon face door covers with the exaggerated smile and sharp teeth. By 2025, manufacturers are developing hyper-realistic vinyl covers that cover the doors in a continuous way. I usually decorate the door with white cobweb, and hang small black cutouts of bats which move in the wind.
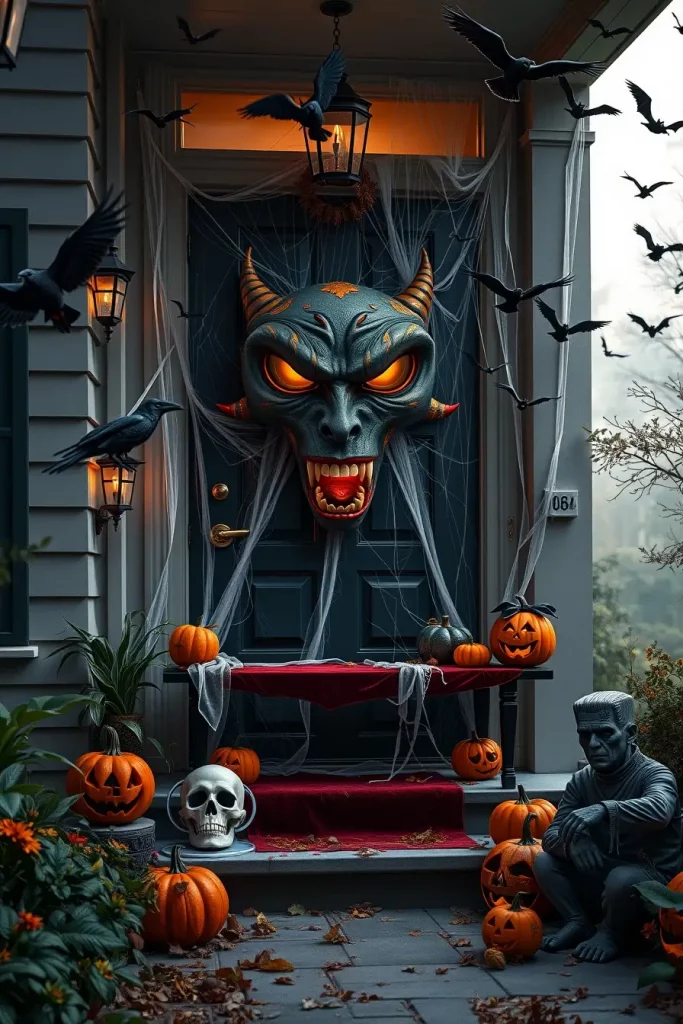
I add a wrought iron-type bench close by, covered in dark red velvet, and a Frankenstein bust is sitting on one end. On the sides, I placed cobweb-decorated fake pumpkins and crow figures that are just out of a gothic horror movie. I stick some foam claws and bloody handprints near the doorframe as though a monster is trying to get out. This framing directs the eye of the viewer and turns the door into an interactive visual center.
Having used these setups in different homes, I’ve found that pairing creepy smiles with subtly moving elements (like slightly open doors triggered by motion) amplifies the horror. Recently, HGTV has released an article stating that the application of fabric, light, and movement to the styling of your front door makes the entire house appear to be alive and this arrangement fits the bill.
To finish the design, I would recommend placing eerie green or purple light under to cast shadows up on the demon face. It adds to the evil look and makes it pulsating and life-like.
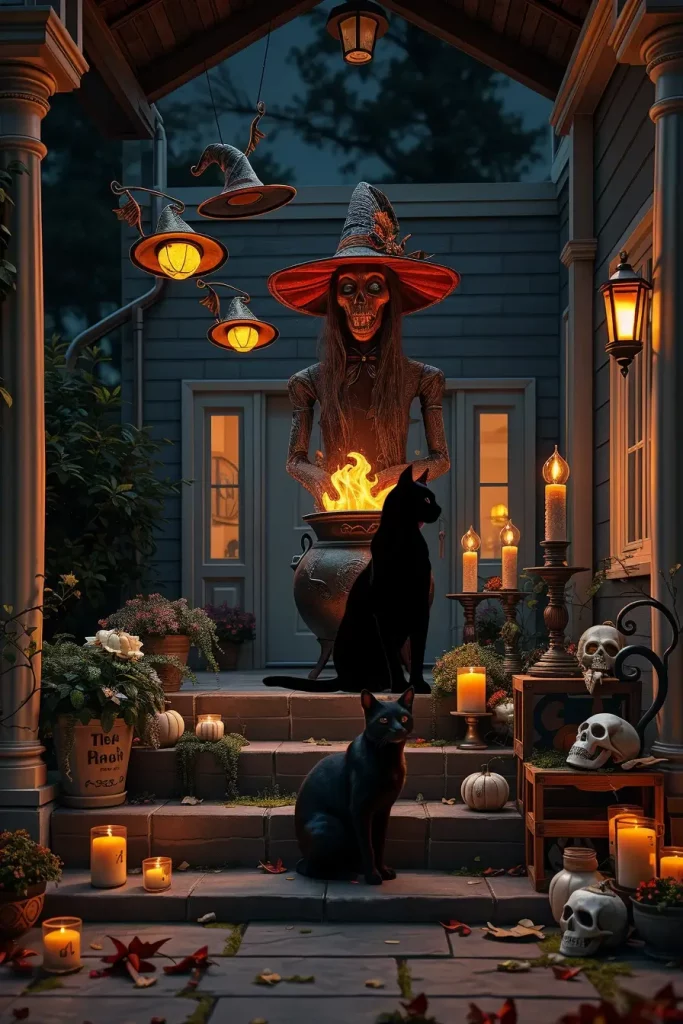
Animated Halloween Props: Bring the Night to Life
The decor outside has evolved a lot and the trend in 2025 is the animated Halloween decor that talks, moves, or glows. I prefer to put these in lawns or porches where people are automatically attracted to it. My favorites are a motion-activated skeleton that comes out of a grave, a floating ghost, and a cackling witch that is stirring a foggy cauldron. These provide a dynamic touch to the arrangement and attract adults and children.
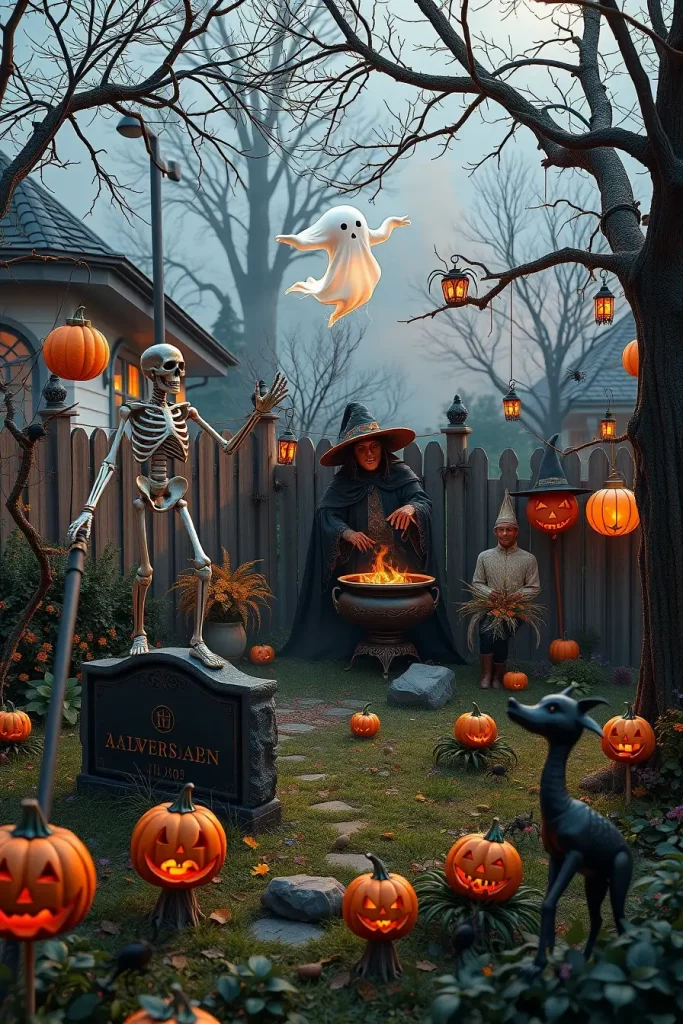
I design the scenes with benches, broken fences, and a fake fire pit with red-orange lights and pumpkin lanterns. Close to the cauldron, I place a wooden table with some spell books scattered and jars of creepy things: eyeballs, black spider figurines, and plastic snakes. I place hanging witch hats on trees and a climbing Halloween scarecrow on wall that seems to be observing people.
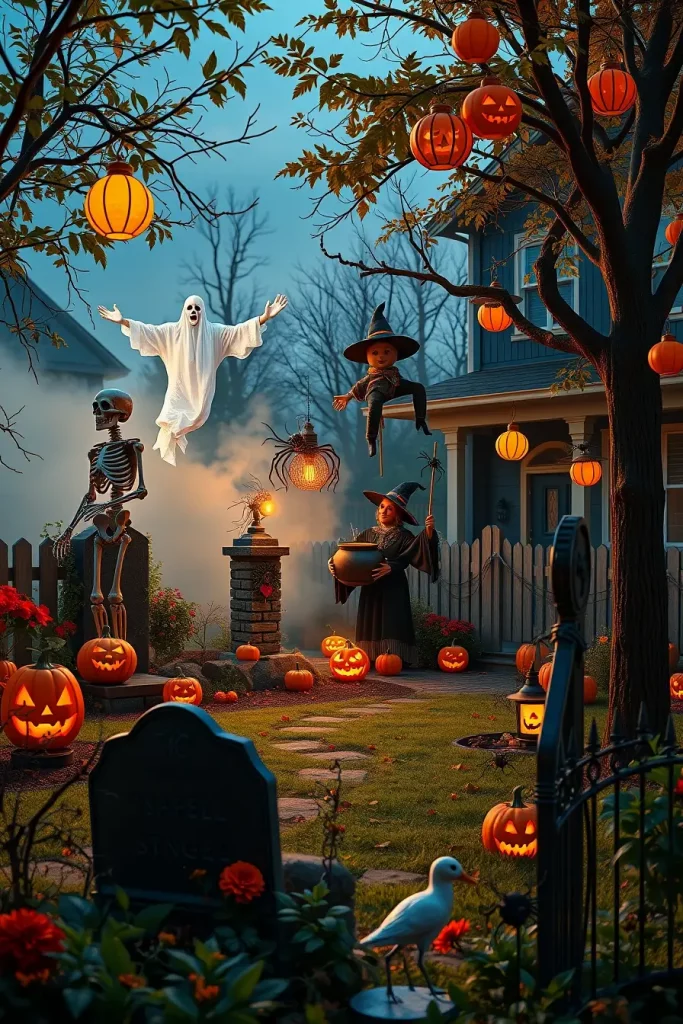
Personally, in my own displays, I have experienced the difference between how much more memorable animated props become when they are located in little scenes as opposed to being scattered. According to specialists at Country Living, the context and storytelling are essential to Halloween displays. That knowledge has encouraged me to never fail to use props in groups to imply a story.
The last thing I would like to mention is the background music that would be very light and would consist of the forest sounds and the screams and creaking tree branches. This would further add realism to it and keep the visitors fully engaged.
Halloween 2025 is the right moment to make your outdoor area a hauntingly memorable one. Whether you’re layering cobweb and bloody handprints on your door or setting up a lifelike witch effigy in your yard, each detail adds to the magic—and the fright. Any favorite decoration trick or Halloween gag? Share it in the comments—we’d love to hear how you’re scaring up your space this season!